YOUR NO 1 WOODWORKING POWER TOOLS RESOURCE WEBSITE
28 Innovative xTool D1 Pro Project Ideas: From Hobbyist to Entrepreneur

Disclosure: If you click on some of the links, we may earn a small referral fee. Please know that we only recommend products that we use and believe will add value to our readers.
Struggling to find that sweet spot where your creative passion meets a profitable niche? It’s a common challenge: you’ve got the skills and perhaps even the tools, such as the versatile xTool D1 Pro, yet you’re stuck wondering what projects could truly captivate your customers’ interest and open a steady stream of revenue. The world of laser engraving is vast, and finding your unique offering can be daunting.
That’s where this article bridges the gap. We understand the pain of hitting a creative block or the uncertainty that comes with entrepreneurial ventures. This gigantic guide is designed to navigate you through the maze of possibilities with the xTool D1 Pro, offering 28 project ideas that range from simple to sophisticated, purely personal to potentially profitable.
We’ll not only inspire your next creation but also arm you with practical steps and tips to transform your laser engraving pursuits into a thriving business venture or a rewarding hobby. So go grab yourself a cup of coffee and sit back as we uncover our top 28 Innovative xTool D1 Pro Project Ideas.
Brief Overview of The xTool D1 Pro Laser Engraving Machine
xTool D1 Pro Laser Engraving Machine.
Need a laser machine that is affordable, powerful, yet still perfect for beginners? Check out the xTool D1 Pro machine.
The xTool D1 Pro Engraving Machine stands at the forefront of engraving innovation, tailored for both hobbyists dreaming of personal customization and entrepreneurs aiming for success. This advanced tool presents a game-changing opportunity for anyone passionate about bringing intricate designs to life on a myriad of materials.
Boasting high-power laser modules of 20W and 10W, the xTool D1 Pro offers the unique flexibility to tackle a diverse range of projects. Its prowess in precise focus adjustment allows craftsmen to venture into deeper cuts, significantly broadening their creative and commercial horizons. With a spot size fine-tuned to 0.06*0.08mm, the 10W version excels in ultrafine engraving, capturing impeccable detail that elevates the quality of your work.
Read our full review of the xTool D1 Pro Machine here.
10 xTool Beginner-Friendly Projects to Get You Started
Embarking on your creative journey with the xTool D1 Pro doesn’t have to be intimidating. Here are 10 beginner-friendly project ideas that will ease you into the crafting world, along with some practical tips for first-time users.
1. Custom Coasters

Creating custom coasters with the xTool D1 Pro is a delightful project that’s perfect for beginners. By starting with them, you’ll quickly become familiar with the xTool D1 Pro’s capabilities, the nuances of material settings, and the satisfaction of turning simple materials into artful and functional items. Here’s how you can dive into making custom coasters:
First, Choose Your Material
Wood and acrylic are fantastic choices for durability and ease of engraving. For beginners, start with materials like birch plywood or medium-density fiberboard (MDF), as these are not only cost-effective but also exhibit excellent results when engraved. Acrylic, on the other hand, offers a sleek, modern look and comes in various colors and finishes.
Designing Your Coasters
Monograms and geometric designs are not just timeless; they’re also simple enough for first-time users to manage successfully. You can create or download vector designs and use the xTool software to scale them to fit your coaster size.
Settings Tips
- Wood: If you’re working with wood, a good starting point is a speed setting of 300 mm/min and a power setting of 100% for engraving. For cutting out your coasters, you may need to adjust the speed lower, around 100 mm/min. A great tip is to begin with test runs on scrap pieces to find the ideal balance that doesn’t burn the wood excessively.
- Acrylic: For acrylic, start with a higher speed of around 300 to 350 mm/min and a power setting of 70%. Acrylic should be engraved fast enough to prevent melting but slow enough to achieve a clear, crisp design.
Finishing Touches
Once engraved, sanding the edges of wooden coasters will give a smooth finish, while acrylic edges can be flame-polished for clarity. Consider adding rubber feet or a cork backing for an extra professional touch that also prevents slipping.
2. Keychains
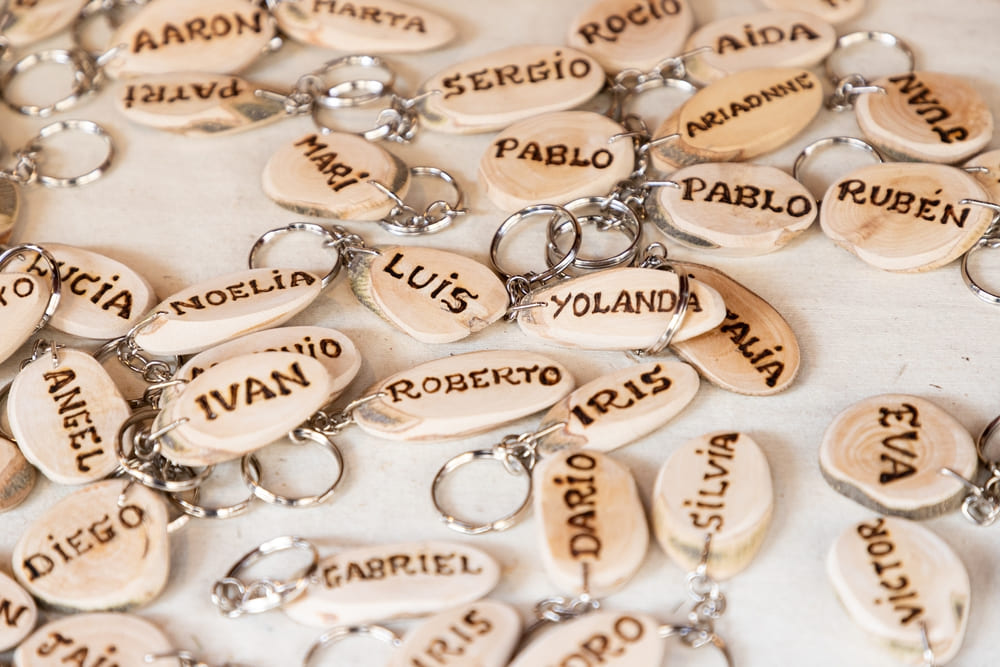
Keychains are a staple start-up project for anyone getting into the laser engraving because they’re incredibly versatile and quick to produce. They also provide valuable practice in detailing on a small scale.
First Step – Material Selection
Acrylic is durable and offers a high-quality finish with a variety of colors to choose from. It’s excellent for crisp, clear engravings that make names and icons pop. On the other hand, leather provides a classic look and feel that can appeal to customers seeking a more traditional or upscale product.
Designing Your Keychains
Keep designs simple for starters., initials, or uncomplicated icons are perfect for getting accustomed to the nuances of engraving. Vector-based designs work best as they can be scaled without losing quality.
Tips for First-Time Users
- Settings for Acrylic: Begin with a lower power setting to avoid melting the material. A good benchmark is to start at a power setting between 70-80% and a speed of around 300 mm/min for engraving. For cutting out your keychains, adjust your settings to cut through the material cleanly, typically at a slower speed.
- Settings for Leather: Leather is more forgiving but also requires caution to avoid burning or charring. Start with a low power setting, around 30-50%, and a speed of about 500 mm/min for engraving. Test on a scrap piece to dial in the perfect settings before moving onto your actual piece.
- Focus on Precision: With small items like keychains, precise positioning is crucial. Use the xTool D1 Pro’s red dot pointer for accurate alignment.
- Finishes and Assembly: After cutting and engraving, apply a clear sealant on acrylic to enhance durability. If you’re using leather, consider a leather conditioner to protect and polish the final product. Attach key rings and any clasps or hardware for functionality.
3. Bookmarks
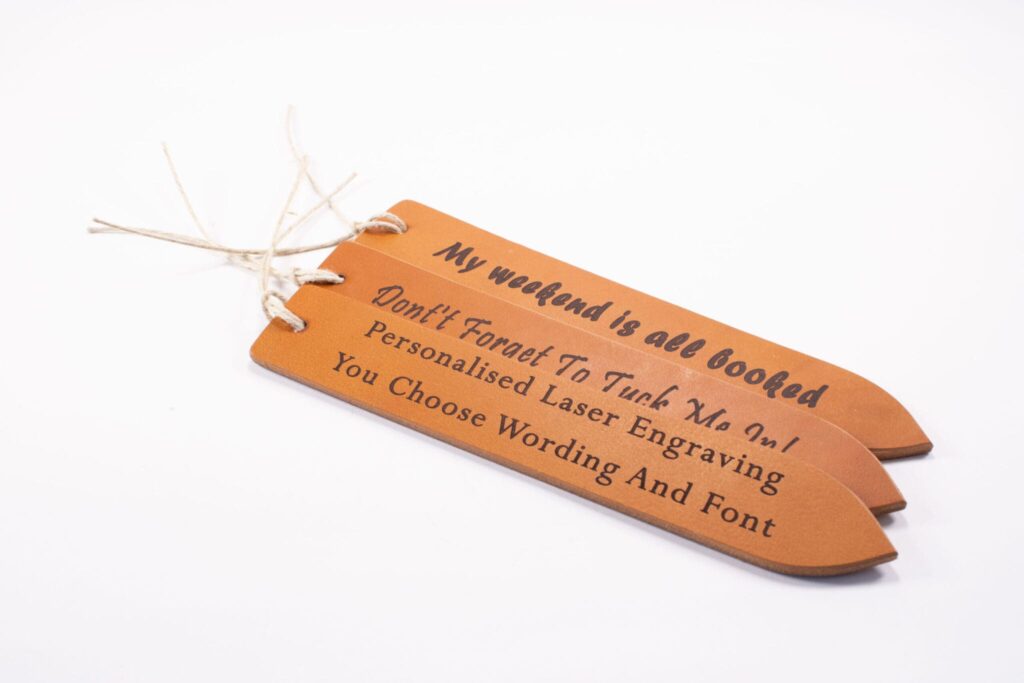
Crafting elegant bookmarks from thin wood or leather materials with your xTool D1 Pro laser engraver can be a delightful experience, elevating the beauty of any book collection. These bookmarks can be intricately engraved with quotes, artwork, or personalized designs, making them cherished gifts for avid readers or sophisticated keepsakes for yourself.
Selecting Materials
For bookmarks, thinner materials work best, providing flexibility and durability without being too bulky. When choosing wood, opt for softwoods like birch or cherry that are around 1/16 to 1/8 inches thick, as they engrave cleanly and easily. Alternatively, for leather bookmarks, a nice quality vegetable-tanned leather with a thickness of about 2mm is ideal, offering a luxurious feel and a beautiful engraving surface.
Design Considerations
For thin wood, quotes and patterns that have a good contrast are highly recommended. They stand out well against the wood grain. With leather, intricate patterns or stylized initials create an elegant effect that enhances with age.
Tips for First-Time Users
- Wood Settings: Begin with lower power and a higher speed to avoid burning the wood. A recommended starting point might be 80% power and 300 mm/min speed for the engraving. The exact settings can vary based on the type of wood and how dark you want the engraving to be, so it’s always wise to run a test engraving.
- Leather Settings: Leather requires careful attention to avoid over-burning. Start at a power of around 30-50% and a speed of 500 mm/min. Leather tends to engrave quite quickly, so test on a scrap piece to prevent ruining your bookmark.
- Focus: Proper focus is crucial for detailed work like this. Make sure the laser is correctly adjusted for the material thickness for the sharpest engraving.
- Finishing Touches: After engraving, gently wipe your bookmarks with a clean dry cloth to remove any residue or burn marks. For wood bookmarks, a light sealant can be applied for longevity, and for leather, a conditioner can help maintain its quality.
4. Signs and Nameplates
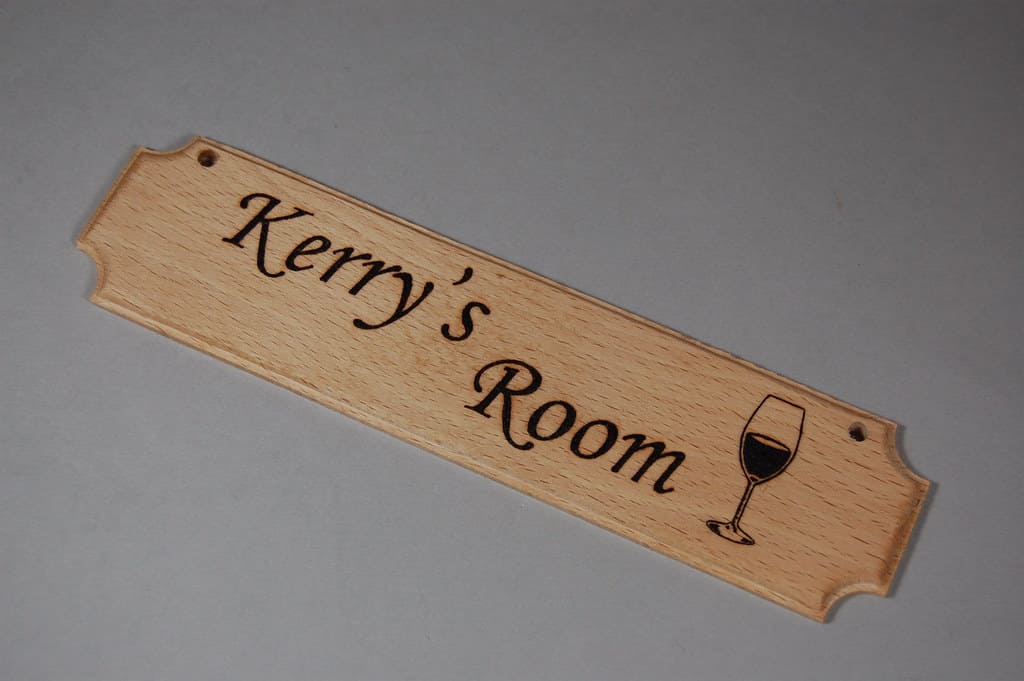
Creating personalized wooden signs and nameplates is an exciting way to expand your laser engraving portfolio and cater to a broad audience, including businesses seeking to enhance their workplace or homeowners wanting to add a custom touch.
Material Selection
Wood is the most favored material for signs and nameplates due to its natural beauty and versatility. For a start, it is recommended to choose plywoods like birch or maple as they are consistent in texture and react well to laser engraving, resulting in cleaner and more legible text or designs.
Designing Signs and Nameplates
For signage and nameplates, you will often deal with text and possibly company logos or decorative elements. Choose fonts that are clear and readable but also reflect the character of the person or business. Sans-serif fonts like Arial or Helvetica are great for a modern look, while serifs like Times New Roman add a traditional touch.
Tips for Beginners
- Settings for Wood: When engraving wood for signs or nameplates, you want to aim for a setting that darkens the wood enough to read clearly without burning too deep and potentially ruining the aesthetics. A safe starting point would be around 70% power and 300 mm/min speed for engraving. However, do a few test runs on scrap pieces to ensure the settings are just right for your specific wood type.
- Multiple Passes for Depth: If you want the text on your signs or nameplates to have some depth, consider doing multiple passes with the laser at varying speeds. This allows for a controlled deep engraving without the risk of burning the wood on the first go.
- Finishing: Once engraved, and especially if your sign is meant for outdoor use, apply a sealant to protect it from the elements. For indoor nameplates, a simple coat of mineral oil or a wood conditioner can enhance the appearance and longevity of the wood.
5. Jewelry Pieces

Creating jewelry pieces such as wooden earrings or acrylic pendants is not only an enjoyable venture but also an excellent way to delve into the world of detailed laser cutting and get comfortable with your xTool D1 Pro machine.
Getting Started with Materials
- Wood: Opt for lightweight and fine-grain woods like walnut, cherry, or birch wood for earrings due to their durability and excellent engraving qualities. Their natural hues also provide a great canvas for your designs.
- Acrylic: This comes in a variety of colors and transparencies and is perfect for making statement pendants. Ensure you purchase cast acrylic specifically designed for laser cutting as it has a cleaner edge and finer detail compared to extruded acrylic.
Designing Your Pieces
When designing, think about the appeal of the piece and its wearability. Intricate patterns, like geometric or mandala designs, are currently on-trend. For a more personal touch, adding initials or short names to designs makes them meaningful for customers.
Tips for First-Time Users
- Setting for Wood: For earrings or pendants, set your machine at a lower power around 70% with a speed of 300 mm/min to start. Woods like walnut can be dense, so you may need to adjust accordingly Always run a test on a similar scrap piece of wood first to ensure the settings do not char the edges.
- Setting for Acrylic: Higher speed settings work better for acrylic, as it helps prevent the material from melting. Start at speeds of 300-350 mm/min and adjust power settings based on thickness; 70% power is a good starting point for thinner pieces. Keep experimenting on pieces to achieve clean and crisp engraving.
- Finishing Touches: For wood, you may sand the edges lightly for a smooth finish, while acrylic edges can shine with a bit of manual flame-polishing.
- Assembly: Attach your hardware, like earring hooks or pendant chains, using jump rings to finish the piece. Remember to factor the weight for earrings as comfort is key for wearable items.
6. Greeting Cards
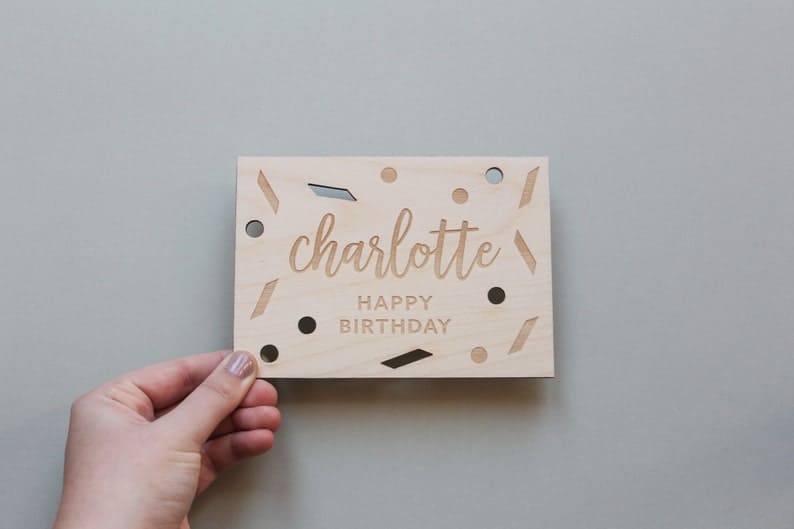
Creating laser-cut paper/wood greeting cards that feature pop-up elements or intricate cut-out designs is a beautiful way to offer a stand-out product, whether for personal, retail, or bespoke occasions.
Choosing the Right Material
- Opt for high-quality cardstock that’s thick enough to hold its shape when popped-up but thin enough for the laser to cut through cleanly. A weight of around 65-110 lbs (176-300gsm) works well.
- Consider the texture and color of the paper. Textured papers can enhance the card’s aesthetic, while lighter colors can highlight the intricacies of your design more effectively.
Designing Your Cards
- For pop-up cards, utilize designs that have connecting points strong enough to support the ‘pop’ structure when the card is opened.
- With cut-out designs, ensure your patterns are not too delicate that they tear easily, nor too chunky that they lose their intricacy.
Tips for First-Time Users
- Settings for Cutting Paper: The laser settings for cutting paper on your machine will be significantly different than those for denser materials. Generally, you want to use the lowest power setting with a fast speed to prevent burning. Start at a speed of around 300-500 mm/min and a power setting of around 5-10%, and adjust based on your material and design detail.
- Testing is Key: Before you start work on your final design, conduct tests on small pieces of the same paper. This helps you to fine-tune the settings and reduce wastage.
- Keep an Eye on the Process: Due to the paper’s flammability, always monitor the laser while it’s working. Keep your fire extinguisher or a water spray bottle handy just in case.
- Handling: Handle the finished pieces with care, especially when folding the pop-up elements. A bone folder can be a useful tool to sharply crease your folds without causing damage to the paper.
7. Picture Frames

Engraving wooden picture frames is a warm and personal project that appeals to a wide audience. It’s perfect for those looking to add a touch of heart to their home or wanting to give a meaningful gift.
Choosing Your Material
Wooden picture frames are accessible in various species, but for engraving purposes, you’d want to choose a type with a lighter grain such as pine or basswood. These lighter woods allow the engraving to stand out more prominently and offer a smooth surface for cleaner lines.
Design Tips
When considering design, simplicity often speaks volumes. Deciding on a classic pattern or an uncomplicated message can make the process easier and will stand the test of time visually. Whether it’s a name, a date to commemorate an occasion, or a short inspirational quote, ensure your text is clear and the font chosen is engraving-friendly (avoid fonts with very thin lines or overly intricate details for best results).
Tips for First-Time Users
- Settings for Wood: Engraving settings may vary depending on the species of wood and the wattage of your machine. Generally, for a 10W laser, the starting settings for engraving would be a power setting of 70-80% and a speed of around 150-200mm/min. It’s essential to do a few test runs on a similar wood sample to finalize the settings that work best for you.
- Prepping the Frame: Before engraving, ensure your wooden frame is clean and free of any coating that could interfere with the engraving process. If the frame has a finish, you might need to lightly sand it off in the area you intend to engrave.
- Focus is Key: Before starting your project, make sure the laser is properly focused on the surface of the frame. Correct focusing ensures that your engraving will be sharp and clear.
8. Display Boxes

Crafting small acrylic display boxes is a fantastic project that combines utility with charm, making it an attractive item for anyone looking to showcase treasured keepsakes or present gifts in a unique way.
Material Selection
Choose a high-quality cast acrylic for its excellent laser-cutting properties. It’s preferable to use thicker acrylic (around 3-5mm) for sturdiness, but remember, the thicker the acrylic, the more power or slower speed you’ll need to cut through it cleanly.
Designing Display Boxes
Your design should include all six sides of the box with tabs that fit together seamlessly. This will ensure stability and strength in the final product. For a professional touch, consider engraving the sides with patterns or personal messages before assembly.
Tips for First-Time Users
- Settings for Acrylic: When laser cutting acrylic for your display boxes, you want to achieve a flame-polished edge. Start with a lower power setting and a high speed, around 10-20% power with a speed of 300-350 mm/min, and adjust as necessary. It’s crucial to do some test cuts to ensure the settings do not cause the material to melt excessively or not cut through completely.
- Ventilation: Cutting acrylic can produce fumes; make sure you work in a well-ventilated area or have effective exhaust system in place.
- Protective Paper: Acrylic sheets often come with a protective paper coating Keep this on during the cutting process to protect the surface from scratches or burn marks from the laser.
- Assembly: After cutting out the pieces for your box, peel off the protective paper and begin the assembly process. It’s usually best to start by joining the sides together, followed by the top and bottom. For bonding, use an acrylic glue or solvent that is specifically designed for this type of material, as it creates a strong, clean bond.
9. Leather Bracelets
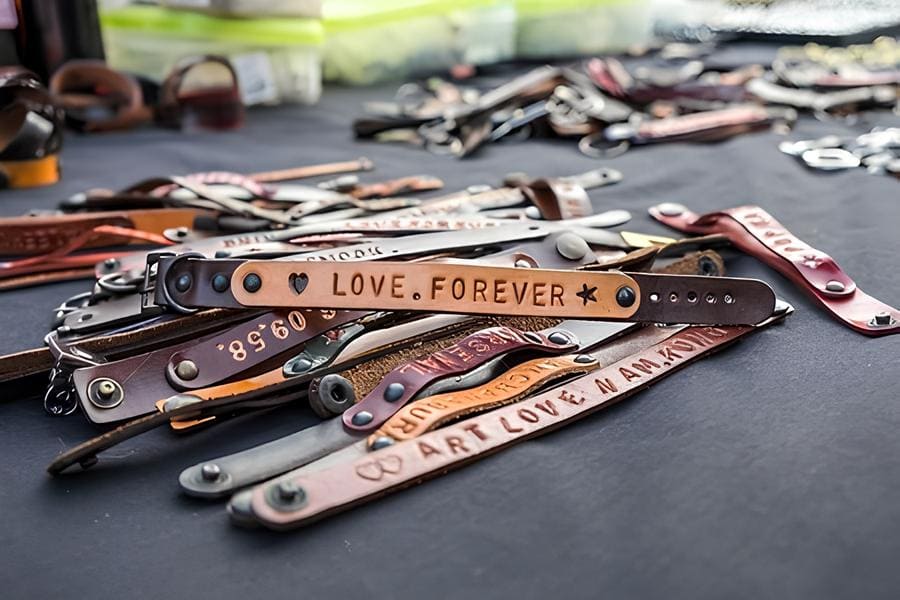
Leather bracelets are the quintessential entry-point for laser engraving wearable crafts, offering flexibility in design and personalization that appeals to a vast market. With the xTool D1 Pro machine, you can intricately engrave names, symbols, or even detailed graphics onto leather, making each bracelet not only a fashion statement but a piece of personalized artistry.
Tips for first-time users:
- Choosing Leather: Opt for vegetable-tanned leather as it responds well to laser engraving and is friendly for accessory use due to its natural processing methods.
- Choose a leather thickness that suits the style of bracelet you intend to make; typically, 1-2mm thick leather is pliable for a comfortable bracelet yet enough for a quality engraving.
Design Customization
- Implement simple yet classic designs for ease of engraving and timeless appeal. Consider initials, short quotes, or trendy icons.
- Ensure your design is clearly outlined and centered on the bracelet to ensure a balanced look.
Laser Settings
- Start with lower power settings since leather can burn easily. You may begin about 30-40% power and a speed of 300-400 mm/min on the xTool D1 Pro 10W machine.
- It’s a best practice to perform some test runs on a scrap piece of leather to get the engraving to your desired depth and darkness without excessive burning.
After Engraving
- After engraving, it is worthwhile to apply a leather conditioner to the bracelet to preserve the material and give it a soft, wearable quality.
- If any residue from the engraving remains, gently wipe the bracelet with a clean, dry cloth.
10. Wall Art
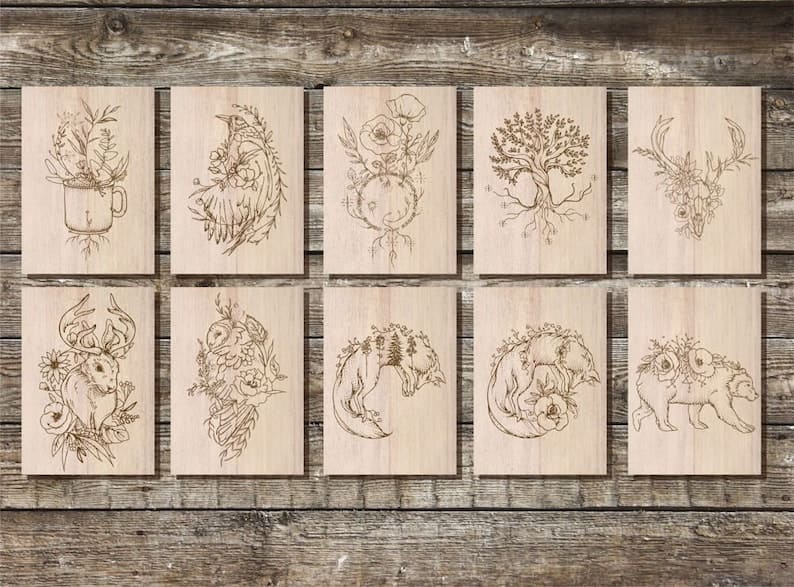
Crafting wooden wall art with the xTool D1 Pro laser engraver is a fantastic journey into the world of large-scale projects and offers a perfect canvas to experiment with aesthetic layering and shading.
Selecting the Material
- When choosing wood for your wall art, opt for lighter types like birch wood, poplar, or basswood. These woods engrave well, revealing a range of natural tones and shadows that enhance your artwork.
- Consider the grain pattern and natural color variations, as these will contribute to the final look of your piece.
Designing Your Art
- Start with a design concept that translates well into a large format—think bold lines and distinguishable shapes that have visual impact from a distance.
- When working with burns for shading, choose designs that will showcase the dual tones well, such as landscape scenes or images with natural gradations.
Tips for First-Time Users
- Settings for Shading: For creating different shades, you’ll want to vary the laser speed and power. Lighter shades can be achieved with faster speeds and lower power, while darker shades require slower speeds and higher power. It’s essential to do some test pieces to determine the right settings for your design and wood type.
- Layering Techniques: Large-scale projects often benefit from layering. By engraving areas in passes, adjusting the settings each pass-through, you can build up depth and contrast in the image.
- Material Handling: Ensure your material is flat and securely fastened to avoid any movements during the engraving process. If the wood isn’t flat, you can face issues like out-of-focus areas in your engraving.
- Protective Coating: Since wall art will be exposed, protect your finished piece with a clear sealant that will accent the engraved areas and protect against dust and fading.
10 xTool Intermediate Projects for Seasoned Crafters
These projects will not only have you utilizing the full potential of the xTool D1 Pro but also lead you closer to product perfection.
11. Customized Phone Stands
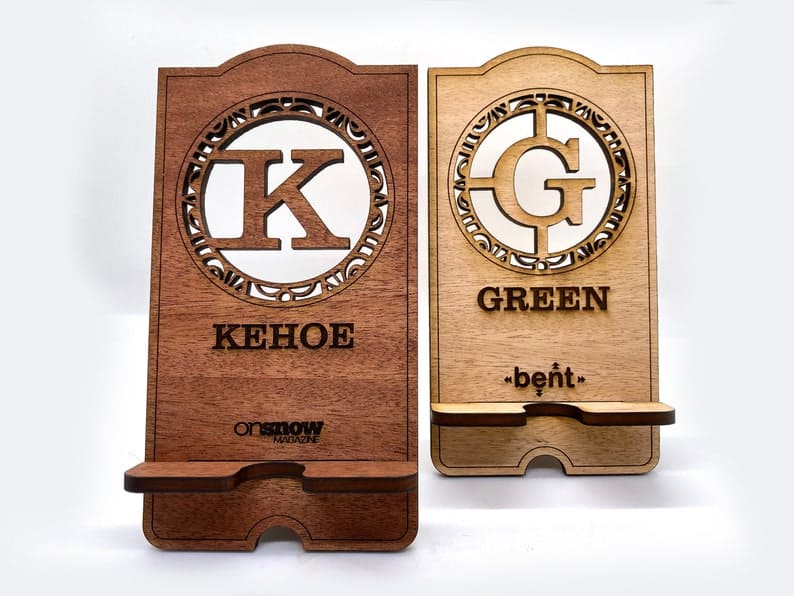
Creating Customized Phone Stands with intricate designs or personalized quotes can truly elevate your crafting game and offer a unique product for your customers. Here’s a detailed guide on how to craft these stands with the xTool D1 Pro machine.
Material Selection
Opt for a high-quality, sturdy hardwood like walnut for its durability and premium finish. Ensure the wood is flat and has a uniform thickness for consistent engraving and cutting.
Design Creation
Use design software compatible with xTool D1 Pro to create or import your intricate patterns and quotes. Adjust the artwork size according to the dimensions of your intended phone stand.
See our article on the 10 best laser engraving software for wood crafting
Setting up Your xTool D1 Pro
Secure your walnut wood on the work bed. If needed, use the Honeycomb Panel for better stability and to minimize potential burn marks on the reverse side.
Laser Engraving
Begin with the engraving process. Depending on the intricacy and desired depth of your design, you might need to adjust the speed and power settings. A slower speed and high power often result in deeper engraving but carry a risk of burning the wood. Running some tests on scrap pieces will help you determine the optimal settings.
Cutting Out the Shape
Once the engraving is complete, it’s time to cut the stand shape. The D1 Pro’s precision allows for clean cuts, and adjusting the settings for a slower cut can ensure the edges are smooth and require minimal finishing.
Dimensional Accuracy for Phone Slot
Plan your cuts carefully to create a slot that will snugly fit the phone. Precision is key, as the fit needs to be tight enough to hold the phone securely while still allowing for easy removal. The slot width can be determined by the phone’s thickness, adding a slight allowance for a case if necessary.
Assembly
If your design involves multiple pieces, assemble them using wood glue or another appropriate adhesive. Ensure that your pieces align accurately and leave them clamped until the glue sets completely.
Optimizing the D1 Pro:
- Focus on focal length: For intricate designs, the laser’s focal length should be finely adjusted. This ensures the sharpest details possible, especially for fine text or detailed imagery.
- Reduce burn marks: Apply a low-tack masking tape over the engraving area before you start. This helps in reducing burn staining around the engraved design.
- Multiple passes for cutting: If the wood isn’t cut through after the first pass, don’t move the material; instead, run additional passes. With multiple shallow passes, you can achieve cleaner edges.
- Clean in-between processes: After engraving, before you cut, clean off any residue with a soft brush or air blower to ensure nothing interferes with the cutting precision.
12. Intricate Mandala Art on Wood

Creating intricate Mandala art on wood is a project that marries the beauty of ancient symbolism with the precision of modern technology.
Select Your Wood
Choose a smooth, fine-grained wood slab like maple or cherry for best results, as they showcase engraved details wonderfully and offer a nice contrast when burned.
Prepare Your Design
Opt for a Mandala design which allows for scaling without loss of detail. You can create your design or source one online. Ensure it is compatible with the xTool Creative Space.
Secure the Material
Place the wood slab onto the work area. If you’re using the Honeycomb Working Panel Set, it can assist in minimizing potential burn marks beneath the wood.
Send Design to xTool D1 Pro
Transfer the Mandala design from your computer to the engraver. You can do this via Wi-Fi, USB, or a card if you’re working offline.
Adjust Laser Settings
Begin with a lower intensity for fine-line engraving, working your way up for deeper cuts or shadings within your Mandala. The 10W laser module is perfect for such finesse, but if you’re using the 20W for its speed, adjust accordingly—often a power setting of 20-35% works well for delicate engraving on wood.
First Engrave Pass
Run the first engraving pass. Watch how the wood reacts. Some woods can engrave differently even within the same species, so adjustments on the fly may be necessary.
Additional Engraving Passes
For deeper or darker areas, additional passes might be required. Adjust the power setting incrementally to avoid burning the wood and maintain the subtlety of the Mandala design.
Optimizing the D1 Pro for Intricate Mandala Arts
- Consistent Focus: Use the precision focus adjustment feature to ensure the laser is perfectly focused on the wood surface for sharp engraving lines.
- Use of Assist: Connect the Air Assist Set to blow away smoke and debris, reducing the chance of flames or smoke stains on your intricate designs.
- Multi-Pass: Enable multi-pass engraving for those deeper areas of your Mandala, which delicately builds up the engraving depth without excessive heat in one go.
- Regular Maintenance: Keep the laser and lenses clean for the crispest engravings. Wood can produce a lot of residues which, if left, can affect the quality of the engraving.
13. 3D Topographic Maps
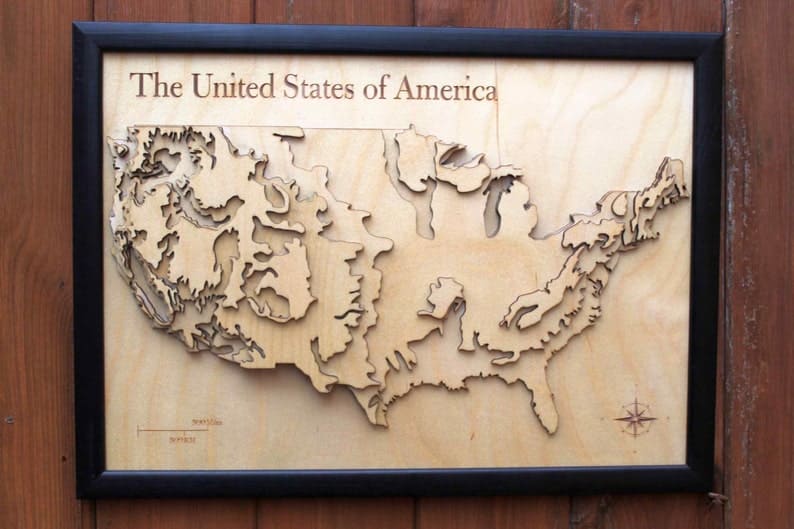
Creating a 3D Topographic Map with the xTool D1 Pro offers a breathtaking way to visualize landscapes, and it’s a project that can beautifully demonstrate the intricate capabilities of your laser cutter. Here’s how you can accomplish this detailed project.
Gather Geodata
Begin by sourcing geodata for your chosen landscape. Several online resources provide this data, which can be translated into a scaled 3D model using specialized software.
Design the Layers
Use software like Fusion 360 or Adobe Illustrator to convert your 3D model into 2D slices representing each elevation layer. Assign each layer a different shade of wood for added depth and realism.
Prepare Your Wood
Choose wood sheets in graded shades to enhance the 3D effect. Make sure all sheets are the same thickness for uniformity and calibrate your D1 Pro to accommodate the material.
Optimize Your Machine
Install the xTool Air Assist Set to keep the cutting area clear of debris for cleaner cuts. If you’re cutting thicker layers of wood, the xTool Risers can raise the machine for additional clearance.
Begin Cutting
Transfer your design files to the D1 Pro via Wi-Fi or USB. Start cutting the layers, beginning with the lowest elevation. For the best precision, use a slow cutting speed and multiple passes for thick wood.
Assemble the Map
Once all pieces are cut, remove any burn marks using fine-grit sandpaper. Assemble the layers in order, securing them with wood glue. Take care to align each layer precisely for a cohesive topographical map.
Finishing Touches
Consider adding a frame or encasing the model in resin for a polished that emphasizes the map’s contours and elevates its visual appeal.
Optimizing the D1 Pro for Precision
- Make sure the laser head is clean and correctly calibrated for high-precision cutting.
- Use the 10W laser for ultra-fine engraving details if your design includes marked topographical points or annotations.
- For intricate cuts, perform test runs on scrap material to refine settings like power, speed, and focus without waste.
- Adjust the tension of the belts on the D1 Pro to ensure the cuts are accurate as possible and to minimize any movement gap.
14. Engraved Cutting Boards
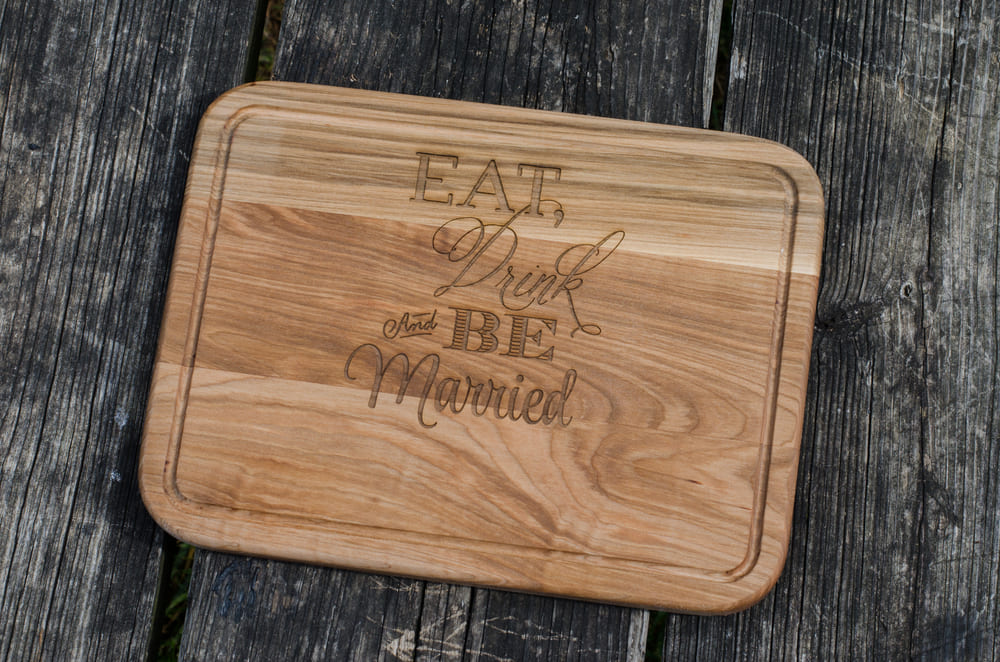
Creating cutting boards with elaborate culinary-themed designs is a fantastic way to diversify your portfolio of laser-engraved products. Here’s a guide on how to create these stunning pieces with your xTool D1 Pro.
Design Planning
The key to an eye-catching piece is in the detail of the design. Begin by choosing culinary-themed artwork, whether it’s intricate vegetables, kitchen utensils, or elaborate typographic recipes. Complex designs with shading can enhance the 3D appearance and realism of the image.
Preparing the Bamboo Board
Select a high-quality bamboo cutting board, ensuring it’s sanded smooth and free of any contaminants. The uniformity of the surface is crucial for detailed work.
Transfer and Configure Your Design
Load your design into the xTool Creative Space or LightBurn software. Optimize the artwork to fit the dimensions of the cutting board and configure the settings according to the bamboo’s properties. Typically, this means adjusting to a lower speed for engraving detailed designs but might vary depending on the thickness and quality of the board.
Test Engraving
Always run a test engraving on a scrap piece of bamboo to confirm that your settings yield the desired intensity and detail for the shading effects.
Engraving the Design
Once satisfied with the test, proceed to engrave the design onto the actual cutting board. Be patient as such detailed work might take longer, and watch carefully for any signs of burning or uneven engraving.
Enhancing the Contrast
Post-engraving, if a deeper contrast is desired, you can lightly sand the surface to clean the top layer. This step can help make the engraving pop against the lighter background.
Finishing
Apply a food-safe mineral oil to both protect the bamboo and bring out the richness of the engraved design.
Optimizing the xTool D1 Pro for Detailed Designs
- Ensure consistent focus by finely adjusting the laser’s height over the material for precise shading.
- Engage the Air Assist feature to prevent flames and keep the engraving area clean.
- Consider using the Honeycomb Working Panel underneath the bamboo for improved backside protection.
- Run multiple low-power passes for complex shading rather than one high-power pass to avoid deep burns and maintain the intricacy of the design.
- Regularly clean the lens and check the laser’s path to ensure there’s no debris affecting the quality of the engraving.
Advanced Tip
For full-shade images, converting your design to a dot matrix can create stunning photorealistic engravings on the bamboo, making use of the D1 Pro’s capabilities to modulate power output dynamically for each tiny dot.
15. Decorative Lanterns with LED Inserts
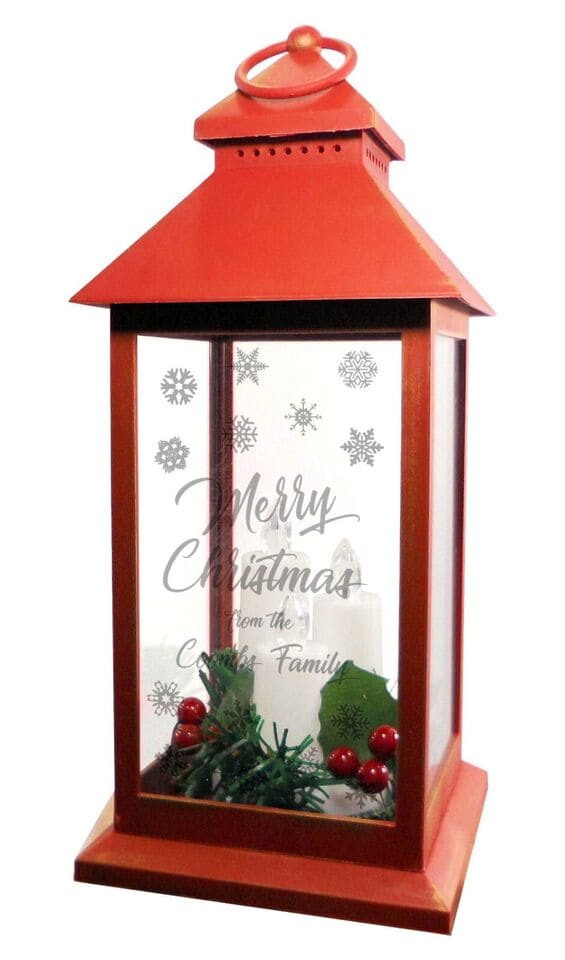
Crafting decorative lanterns with LED inserts is a project that perfectly showcases the intricate possibilities of using xTool D1 Pro’s laser engraving and cutting technology.
Design the Lantern Panels
The first step is to create or obtain your ornate patterns which will define the look of your lantern. Considering the LED light will pass through these designs, ensure that the patterns have varying densities to create an intriguing light play.
Select Your Acrylic Sheet
Choose a high-quality acrylic sheet that’s thick enough to stand on its own but thin enough for the LED light to pass through. Clear acrylic is commonly used for its ability to diffuse light softly.
Test Your Settings
Before proceeding with the final acrylic sheet, conduct tests on smaller scraps to ensure the lightest and smoothest engraving appropriate for the LED light to shine through the etched areas effectively.
Engrave and Cut the Lantern Panels
Start the engraving process on your acrylic sheets, followed by the cutting to form the shape of the lantern panels. Carefully monitor the precision and depth as the laser works.
Assemble Your Lantern
Once your pieces are cut and engraved, peel away any protective film, and use an appropriate acrylic glue to assemble the panels into a lantern shape. Leave the top open to insert the LED elements.
Install the LED Inserts
Attach the LED light strips or insert an LED candle within the lantern. If the LEDs are equipped with a remote control, ensure the receiver is discreetly placed yet accessible.
Tips to Optimize the D1 Pro for Intricate Lantern Design
- Maintain a clean laser lens for the finest cuts and engraves.
- Use the Air Assist nozzle to prevent flames on acrylic and to remove the residues providing a cleaner cut.
- Dial the precise settings for a differentiating light effect, you may need to use a higher speed and lower power for engraving, and a lower speed and higher power for cutting.
- If the designs are very intricate, consider multiple passes with the laser at low power settings to prevent melting or warping.
xTool D1 Pro Laser Engraving Machine.
Need a laser machine that is affordable, powerful, yet still perfect for beginners? Check out the xTool D1 Pro machine.
16. Custom Puzzles

Crafting custom puzzles from photos transferred onto wood pieces is a captivating project that can leverage the finesse and intricacy of the xTool D1 Pro.
Select Your Image and Wood Material
Choose a high-resolution photo for clarity upon transfer, and pair it with a quality plywood piece that’s thick enough to be durable but thin enough for precise cutting.
Image Preparation
Prepare your image using photo editing software to adjust contrast and brightness for optimal transfer to the wood. Then, print it onto transfer paper specifically designed for wood applications.
Transfer the Image
Carefully apply the printed image onto the wood surface. Use a credit card or roller to remove any air bubbles and secure the image properly onto the wood. Follow the specific transfer paper instructions for the best results.
Configure Your xTool D1 Pro
Set up your xTool D1 Pro with the right parameters. With puzzles, your focus will be on intricate cuts that allow the pieces to interlock without being too tight or too loose. Run tests on small wood scraps with the jigsaw puzzle template to ensure the precision of the cuts.
The Cutting Process
Once the image is successfully transferred and dry, begin the cutting process. Position the wood into the machine and ensure it’s completely flat for an even cut. Remember, the more complex the puzzle, the more precision is required in the cut.
Separating the Pieces
After cutting, carefully remove the puzzle pieces. If there are any rough edges, lightly sand them down to ensure smooth interlocking.
Sealing and Finishing
To protect both the image and the wood, seal the puzzle with a clear coat. This provides a protective layer for the image and a finished look for the edges of the wood.
Optimizing Your xTool D1 Pro
- Use the air assist feature to keep the cutting line clear of smoke and debris which improves the precision of intricate cuts and protects the transferred photo.
- Choose a cutting mat or the Honeycomb Working Panel Set to prevent flashback during the cutting.
- Tighten all moving parts of your machine, such as the belts, to ensure precision cuts without any jitters or slips.
- If cutting very detailed puzzles, consider the 10W laser for its finer spot size, which will deliver enhanced detail for intricate interlocking pieces.
- Multiple low-powered passes may be more beneficial than a single high-powered one, to create a cleaner cut and reduce the risk of burning the wood.
17. Layered Acrylic Signs with LED Backlighting

Crafting layered acrylic signs with LED backlighting is an advanced project that can truly set you apart from other crafters.
Conceptualize the Design
Begin by sketching out your sign design. Consider the layers needed to create depth and how they might interact with the LED backlighting. Decide where the light will best accentuate the layered effect.
Digitalize Your Design
Transfer your sketches to a digital format using design software compatible with the xTool D1 Pro, such as the xTool Creative Space. Make sure to plan for the cutouts and spaces that will house the LED elements.
Prepare Your Acrylic Sheets
Choose high-quality acrylic sheets that will work well with the engraving and cutting process as well as transmit light effectively. Remove any protective coverings before engraving.
Engrave and Cut the Acrylic
Configure your xTool D1 Pro’s settings for the acrylic thickness you are working with. Keep in mind that engraving should be shallower than the cuts. Perform tests on scrap acrylic for optimal settings. Once configured, start engraving followed by cutting your design.
Assemble the Layers
After the engraving and cutting, assemble the layers using spacers. The spacers will separate the acrylic sheets, allowing room for the LED lights and creating a floating effect for each layer.
Install the LED Backlighting
Attach LED strip lights to the rear of the sign, or in the dedicated cutout spaces for a tailored light effect. Ensure the LEDs are evenly placed to prevent light pooling and to maximize the effect through all layers.
Final Assembly
Attach the power supply and any additional frames or stands that are part of your design. Ensure all electrical connections are safe, especially if the sign will be a permanent fixture in a client’s space.
Optimizing the D1 Pro for the Job
- For crisp engravings, adjust your laser focus precisely with the help of the focus lever. A well-focused laser will ensure that the edges of engravings and cutouts are sharp and clean.
- Use the air assist feature during cutting to reduce flame risks and achieve cleaner edges.
- If working with thicker sheets, xTool Risers can be used to adjust the height of the machine to accommodate the material.
- The acrylic sheets should be kept in place tightly during the process; consider using hold-down clamps for stability.
- The xTool Honeycomb Working Panel Set is recommended to minimize reflection and damage from underneath during cutting.
18. Engraved Leather-Bound Books
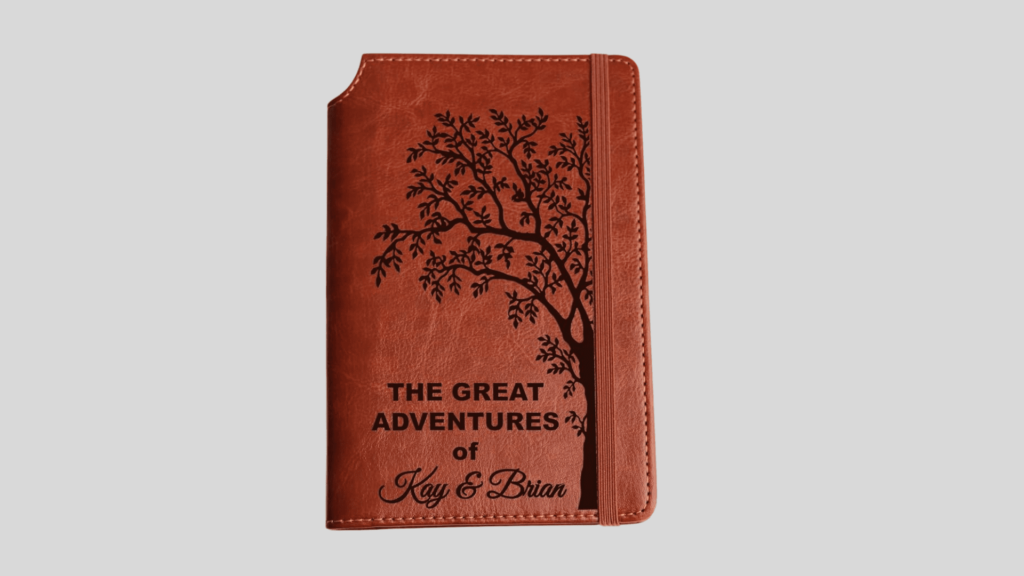
Creating an engraved leather-bound book cover is a refined craft that blends traditional charm with the precision of modern laser technology.
Design Your Artwork
Begin by selecting a vintage design or crafting one that fits the aesthetic you’re aiming for. Utilize design software that’s compatible with the xTool D1 Pro, ensuring that the artwork’s size corresponds to book cover dimensions.
Prepare Your Leather
Choose a high-quality leather that will gracefully accept laser engraving. The surface should be clean, dry, and ideally a bit smooth. You might even consider lightly moistening the leather to achieve a darker engrave.
Test Your Settings
Before engraving the actual cover, do several test engravings on a scrap piece of the same leather. Experiment with different speed and power settings to find the sweet spot that gives you a crisp engraving without burning.
Secure the Leather
Once you have your settings dialed in, secure the leather the D1 Pro’s work area. You can use painter’s tape or any other suitable method that prevents the leather from moving during the engraving process.
Engrave the Design
Send your design to the D1 Pro and begin engraving. Keep an eye on the process to ensure quality and to intervene if necessary. The laser should engrave the leather with clean lines and shading that bring out the best of your vintage motif.
Post-Engraving Finish
After engraving, you may want to apply a leather finisher or sealant to protect the design and give it a polished look.
Assemble the Book
Attach your engraved leather to the book cover using suitable adhesive or traditional bookbinding techniques, making sure it’s smooth and well-aligned.
Optimizing the xTool D1 Pro
- For quality engravings on leather, consider the xTool P2 55W Desktop CO2 Laser Cutter. It’s ideal for achieving crisp detail in your vintage designs.
- Adjust the laser head focus manually before starting for a sharp and precise engraving, as leather thickness may vary.
- If your design includes filled areas, consider a hatch fill in your engraving software to give them a dense and uniform look.
- To prevent leather warping, maintain a steady, moderate pace of engraving; too high of a speed may not engrave effectively, and too slow can burn the leather.
- Keep the laser and the work area clean; leather can produce smoke and debris that could cloud the laser’s path.
19. Custom Chess Sets

Here is a step-by-step guide to take you through the creation process, along with tips on how to optimize your machine for precision and quality.
Design Planning
Select or create the designs for your chess pieces. You’ll need a total of 32 pieces, with 16 for each side, each having a unique height and base size. Plan for two sets of designs—one for the pieces’ outlines and another for any detailed etchings you’d like to include.
Choose Your Material
Decide on wood or acrylic for chess pieces. Both materials have their benefits: wood offers a classic, warm look and feel, while acrylic can provide a modern, sleek appearance, and both can be beautifully engraved.
Prepare Your xTool D1 Pro Machine
Set up your D1 Pro, aligning your chosen material on the workbed. If you’re using the Honeycomb Working Panel Set, position it beneath the material to minimize potential damage from laser reflections and ensure your cuts are clean.
Engraving and Cutting
Start with the engraving process, optimizing the laser settings for fine-detail work. You might adjust the power to a lower setting to avoid burn marks while maintaining enough speed for precision. Once engraving is complete, proceed to cut the pieces out. For intricate designs and precision cuts, use multiple passes with the laser at a moderate speed setting.
Piece Assembly
If your chess pieces require assembly (e.g., multi-layered bases), carefully glue the parts together. Ensure each piece is stable and stand the assembled pieces upright to dry.
Finish and Protect
Once assembled, if you’re working with wood, consider sealing the pieces with a clear coat to protect them from wear and enhance their. For acrylic, a polish can enhance the shine of the pieces.
Optimizing the xTool D1 Pro for Detailed Chess Sets
- Use the 20W laser module for its cutting efficiency, especially for thicker materials or if you’re planning to produce sets at scale.
- Employ the D1 Pro’s precision focus adjustment to ensure your engraving details are sharp and clear on each piece.
- Utilize xTool Creative Space software for precise control over your laser’s movements and to carefully plan the sequence of cuts and engravings.
- Apply masking tape to wood surfaces before engraving to help prevent burn marks and achieve a cleaner finish.
- Consider the xTool RA2 Pro Rotary Attachment for intricate cylindrical engravings, potentially for the sides of the base of the chess pieces.
20. Architectural Model of a Historic Building
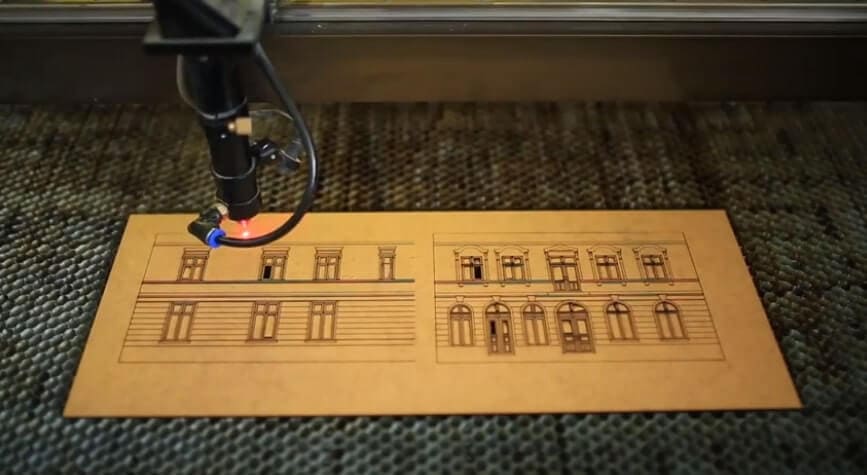
Creating an architectural model of a historic building using the xTool D1 Pro requires precision and attention to detail, given the high-detail work involved in adjusting settings for both cutting and engraving.
Select and Prepare Your Plywood
Choose high-quality thin plywood for the model. It’s sturdy yet layers well for detailed miniature work. Ensure the wood is flat and has a consistent thickness for accurate layering.
Design the Model
Using architectural drawings or photographs of your chosen historic building, use 3D modeling software to create a detailed model. You’ll then slice this 3D model into layers that represent the cross-sections of the building at scale.
Convert to Laser Cutter Format
The sliced model needs to be converted into a format suitable for laser cutting – usually SVG or DXF. Ensure that the design file maintains the integrity of each layer and that the cutting paths are clear.
Test Engrave and Cut on the D1 Pro
Before working on your actual pieces, conduct several test runs on the machine with scrap plywood. Adjust laser settings until you achieve smooth cuts and precise engraving detail. You aim for clean cuts without scorching, guaranteeing seamless assembly later on.
Cut and Engrave Your Layers
Once satisfied with test cuts, proceed to cut and engrave your building layers. Start with low settings and increase power incrementally, monitoring closely to avoid burning the fine edges vital for architectural detail.
Assemble the Model
Carefully piece together the layers of your plywood. Depending on your design, you might need wood glue or another connector to secure the pieces. Take your time in this process; precision in assembly is as crucial as in cutting and engraving.
Finishing Touches
For an exhibition-quality model, paint or varnish may be applied. This step is optional and depends on the desired final appearance.
Optimizing the xTool D1 Pro
- Utilize the xTool Creative Space software for intuitive control during both engraving and cutting phases.
- For detailed engraving work on each layer, precisely focus your laser and consider running multiple passes at lower power to ensure detailed results without burning the wood.
- Install the Air Assist Set for cleaner cuts and reduced risk of charring the delicate pieces since architectural models often feature intricate and minute details.
- Ensure that your D1 Pro’s tension belts are properly adjusted with the tension wheel adjuster, as this will maintain high motion accuracy for detailed work.
- Remember, the xTool Honeycomb Working Panel Set is particularly useful in preventing back reflection damage and results in neater cuts.
Turning Passion Into Profit: 10 xTool D1 Pro Commercial Projects
21. Custom Home Décor Signs

Home décor signs have become an essential expression of individual style for modern homeowners. Delight your clients by offering them the ability to personalize their space with laser-cut signs that proudly display their family name or meaningful phrases. The 20W xTool D1 Pro, is your craftsman’s ally, deftly handling large-scale signs without sacrificing detail on the intricate patterns and typography that define these coveted.
For smaller accents that complement these signs, the 10W laser module allows you to inscribe detailed artwork and finer text. The precision and crisp lines achieved through laser-cutting ensure that each sign is not merely a piece of decor but a work of art that resonates style and elegance.
22. Custom Engraved Barware

Custom engraved barware, such as glasses and flasks, offer a timeless appeal and provide an excellent opportunity for customers looking to personalize their drinking experience or gift something unique.
Selection of Barware
Begin by selecting a range of high-quality glasses and flasks that appeal to different tastes and preferences, from elegant stemware to sturdy beer mugs and hip flasks.
Designs and Customization
Offer a portfolio of design options including initials, full names, logos, or meaningful quotes. Also, allow customers to provide custom designs to add a personal touch.
Using RA2 Pro for Perfection
Utilize the RA2 Pro attachment to rotate cylindrical items like glasses and flasks, ensuring an even and precise etch around the surface. This tool is crucial for achieving consistent quality, which is especially important when engraving logos or text that wraps around the item.
23. Laser-Cut Jewelry
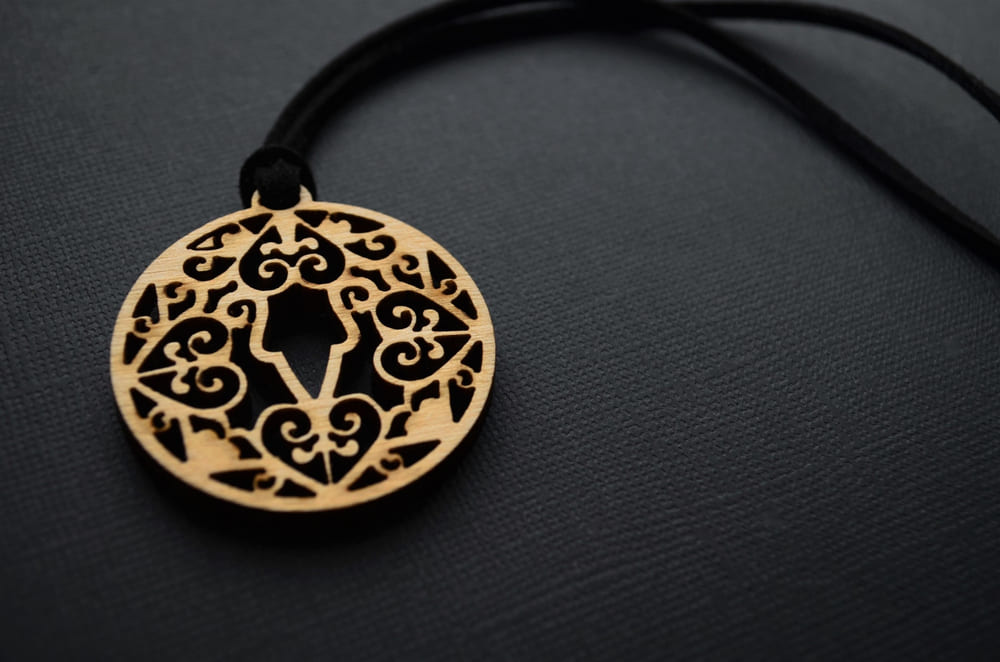
Laser-cut jewelry is a fine example of how the xTool D1 Pro transcends the boundaries of creativity and precision, transforming simple materials like wood and acrylic into elegant, wearable art.
Creating Your Laser-Cut Jewelry Collection
- Design Selection: Start with drafting exquisite designs that can range from minimalist shapes to elaborate, detailed patterns. Software like xTool Creative Space can offer assistance in achieving the accurate design files needed for cutting and engraving.
- Material Prep: Carefully select your wood and acrylic sheets, considering the thickness, durability, and color. Wooden materials bring an earthy, natural aesthetic, while acrylic lends a modern, chic vibe to your jewelry pieces.
- Laser Engraving/Cutting: With the ultrafine capabilities of the D1 Pro, especially when you’re using the more delicate 10W module, you can attain incredibly detailed engravings on your jewelry pieces. The Air Assist Set will significantly improve the quality of the cuts by clearing away any dust or potential burn marks, ensuring that the outcome is precise and clean.
- Post-Process & Assembly: After cutting and engraving, pieces might require a bit of hand-finishing, such as sanding the edges or peeling off protective films. Assemble your earrings or necklaces with the necessary hardware like hooks, chains, and jump rings.
24. Corporate Branded Items
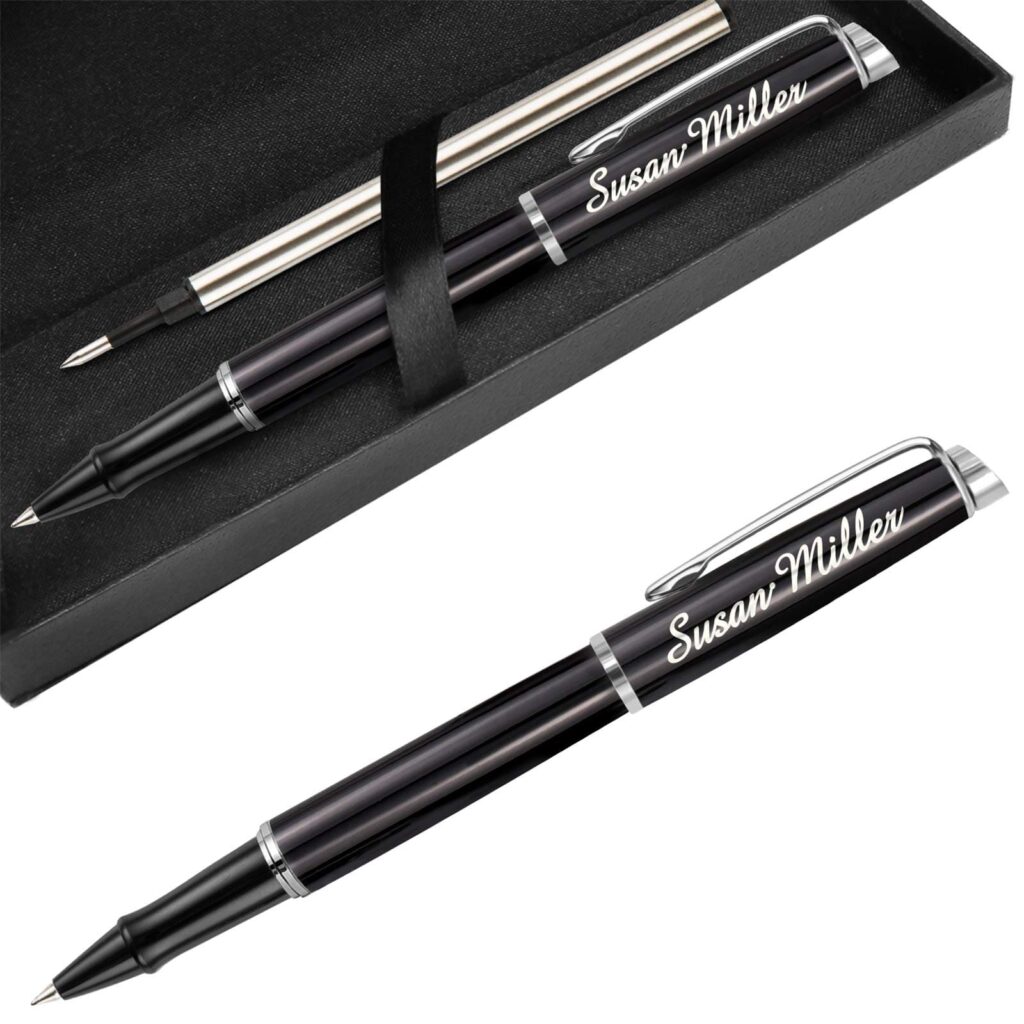
Offering corporate branded items can truly set a laser cutting and engraving business apart, catering to a market that constantly seeks quality and refinement for its promotional products.
Delving into Corporate Branded Items
- Metal Business Card Holders: A sleek and professional item, a metal business card holder engraved with a company’s logo adds a touch of sophistication.
- Custom Engraved Pens: A classic corporate gift, pens can be personalized with laser engraving to feature company names or slogans. The fine engraving capabilities of the D1 Pro mean that even small text is legible and crisp, rendering a professional finish.
- Personalized USB Drives: Engraved USB drives are both practical and a smart branding option. Using the D1 Pro to etch company logos or contact information turns a simple tech accessory into an effective promotional tool.
- Acrylic Awards and Trophies: Recognizing achievement with custom awards or trophies is made impressive thanks to the D1 Pro’s delicate touch on materials like acrylic, providing clear engravings that commemorate success with elegance.
- Coasters with Company Crest: Coasters serve a dual purpose—protecting surfaces and serving as a constant brand reminder.
25. Pet Tags
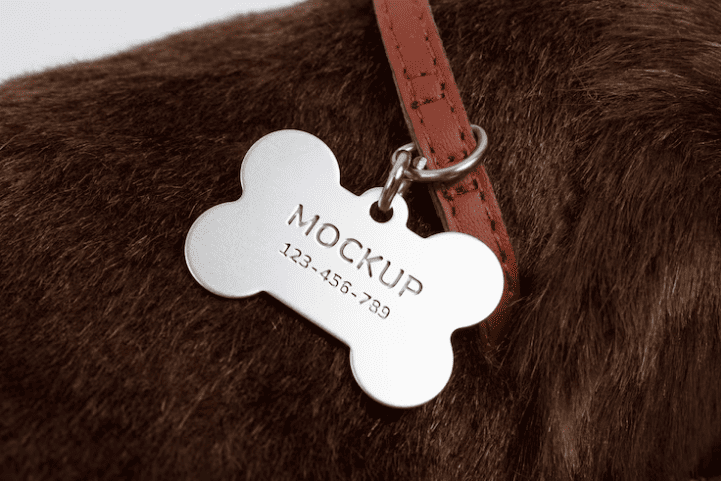
Custom pet tags are a simple yet essential accessory for any pet owner. Here’s how to expand this idea into a successful product line:
Materials and Equipment
Select durable metals such as aluminum, stainless steel, or brass for the pet tags as they resist rust and wear well over time. The xTool D1 Pro, equipped with the appropriate laser module, can etch into these metals with precision, allowing detailed and legible information to be permanently marked on each tag.
Design and Customization
Offer a variety of designs and personalization options for the tags – from standard bones and circles to more unique silhouettes like paw prints or hearts. Enable customization options for the pet owner to include their pet’s name, their phone number, and even a cute icon or decorative border. With the xTool D1 Pro, it’s possible to achieve intricate details on even the smallest of tags, ensuring that all information is clear and easy to read.
Production Process
After designing the tag in your preferred software and setting up the xTool D1 Pro with the correct parameters for your chosen material, attach the metal sheet to the working area of the machine. Use the laser engraver to carefully etch the design onto the surface. The system’s accuracy ensures every character and image is perfectly rendered for a professional-looking tag.
Finishing Touches
Once engraved, remove any residue from the etching process for a pristine finish. Optionally, add a color-fill to make the text stand out more against the metal. Finally, attach a sturdy ring to the tag, ensuring it can be securely fastened to a pet’s collar.
Creativity in Marketing
Market these tags not only as a way for owners to safeguard their pets but also as a stylish accessory. Showcase the customizability with examples and suggest them as gifts for pet-loving friends and family. High-quality images of diverse designs will appeal to pet owners looking for unique identifiers for their furry companions.
26. Wedding Favors
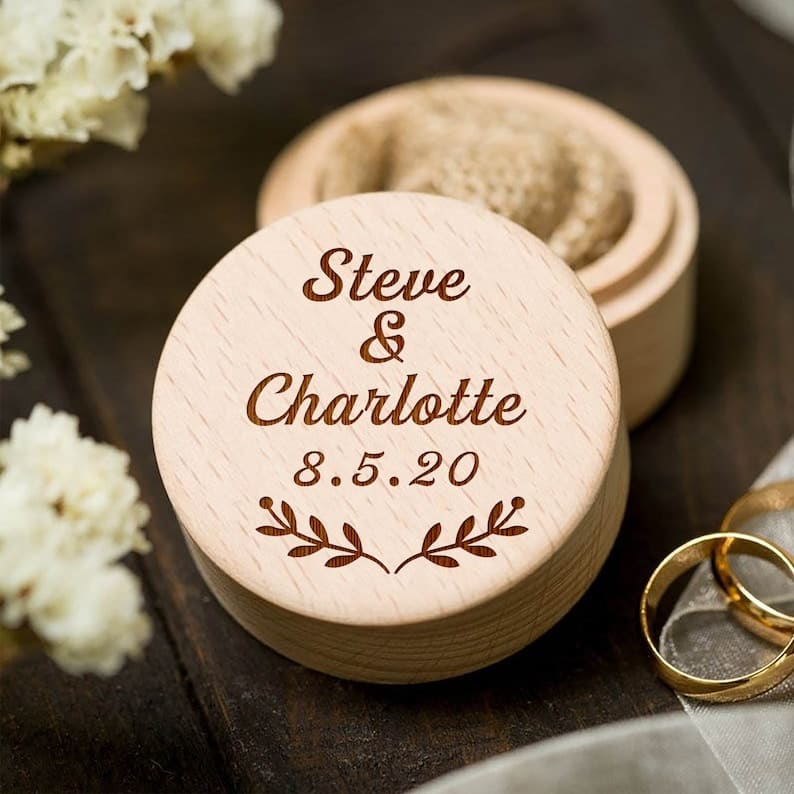
Expanding your range of personalized wedding favors with xTool’s capabilities can truly set your laser cutting and engraving business apart.
Wooden Hangers for Wedding Attire
The aesthetic appeal and utility of engraved hangers provide an enchanting touch to the wedding attire presentation. You can engrave each wedding party member’s role or name onto the hanger, making for a precious photo opportunity and a thoughtful keepsake post-celebration. These hangers will appeal to the attention-to-detail ethos that most weddings embody.
Personalized Wedding Ring Boxes
Each couple cherishes the symbols of their union. Offer them a beautifully crafted ring box with their initials, wedding date, or a special engraved on the top or inside the lid.
Engraved Champagne Flutes
Toast to the couple’s future with bespoke champagne flutes featuring their names and the date etched into the glass. Your xTool D1 Pro can be finely tuned to produce exquisite and delicate designs on glass, demonstrating the sophistication and durability of laser engraving.
Jumbling Tower Game
A customized jumbling tower game engraved with the couple’s names, wedding date, or even guests’ names can serve double-duty as both entertainment and a unique keepsake from the wedding. The xTool’s accuracy ensures every block is perfectly crafted for a professional finish.
Wedding Cards and Guest Books
Laser-cut paper-cut wedding cards and wooden guest books are yet another avenue to display the xTool D1 Pro’s finesse. Offering items like a heart-shaped guest book with names and dates provides a special touch that can also serve as décor long after the big day.
Cake Toppers
The cake is a centerpiece at many weddings, and a personalized topper can be the jewel atop the crown. With xTool’s wood cutting precision, you could offer a myriad of personalized designs, from classic monograms to contemporary figures, capturing the couple’s essence.
27. Custom Smartphone Cases

Delving into the customization of smartphone cases with your xTool D1 Pro is an excellent way to cater to the booming tech accessory market.
Product Selection
Choose high-quality leather cases that are compatible with a variety of smartphone models. A leather case not only offers a premium feel but also showcases laser engraving beautifully. The natural material allows for a crisp contrast when engraved, giving your designs a standout look.
Design Personalization
Provide an array of customization options, from detailed geometric patterns to intricate florals or even personalized text and images.
Production Workflow
Set up your xTool D1 Pro with the appropriate settings for leather — typically a lower power and higher speed to avoid burning — securely fix your leather cases in place on the expansive working area of the machine. The sizable bed of the D1 Pro allows for multiple cases to be engraved at once, effectively scaling up production without sacrificing detail and quality.
Offer Variety
To capture a larger audience, design a line that includes minimalist engravings for those with a simpler taste, as well as more elaborate customizations for those wanting to make a bold statement.
Marketing as Part of a Product Line
Position these laser-engraved leather phone cases as part of a broader collection of personalized goods. This not only increases the perceived value of your offerings but also encourages more substantial orders. Use high-quality images to showcase the superior craftsmanship afforded by your machine on platforms like Etsy, to attract customers seeking custom, handcrafted items.
28. DIY Engraved Wood Projects
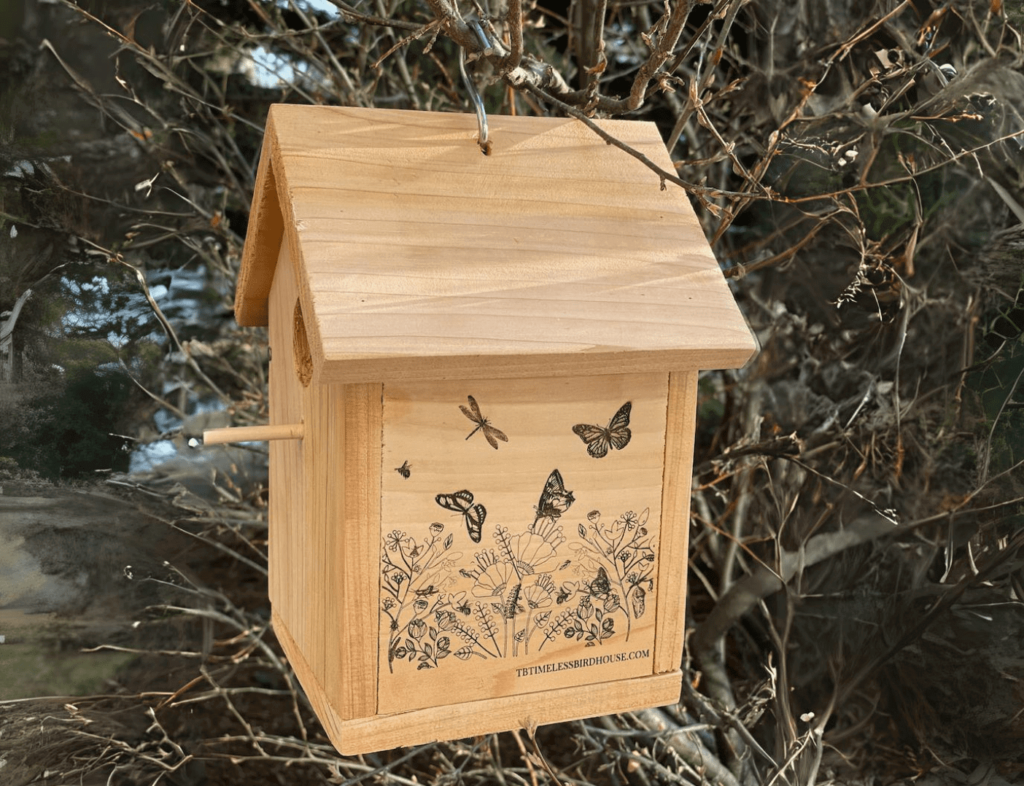
DIY Engraved Wood Projects are an inventive means to engage your customers with hands-on building experiences. By offering pre-cut pieces for assembly projects like birdhouses or simple furniture, you cater to the growing trend of personalized maker activities while leveraging the xTool D1 Pro’s capabilities for mass production.
See our full guide to using a laser engraver for woodworking.
Birdhouse DIY Kits
Start by creating a design template for a birdhouse, considering pieces that can interlock for stability and ease of assembly. Once your design is set, it’s time to translate that into a reality using the xTool D1 Pro.
Mass Production with Precision
Using high-quality plywood – optimal for outdoor use and durability – set up your xTool D1 Pro on the Honeycomb Working Panel Set. This panel aids in the reduction of scorch marks that can occur during the cutting process, ensuring a clean and professional look for each piece.
Cutting Process
Assign the laser cutter to carefully follow your template, making incisions that will allow your customers to easily snap the pieces together. With the laser engraver, you can add decorative details, or even personalize each kit upon customer request. The Honeycomb Panel ensures pieces are cut precisely and consistently each time, allowing you to build kits in bulk.
Packaging and Instructions
Once cut, pieces are sorted and packaged along with easy-to-follow assembly instructions. You might consider including wood glue or any other hardware necessary for the final construction. Instructions not only help customers with assembly but also provide safety tips and recommendations for kit maintenance.
Marketing Your Kits
Position your kits as the perfect weekend project or a thoughtful gift. Highlight the joy of creating something from scratch, the eco-friendly nature of the materials used, and the convenience the kit provides. Engage in hands-on workshops to offer a more immersive experience with your kits, or sell them online for at-home enjoyment.
xTool D1 Pro Laser Engraving Machine.
Need a laser machine that is affordable, powerful, yet still perfect for beginners? Check out the xTool D1 Pro machine.
Frequently Asked Questions (FAQs)
Is Laser Engraving with the xTool D1 Pro Machine a Profitable Business?
Yes, laser engraving with the xTool D1 Pro can definitely be a profitable business. The key is to identify your niche, produce high-quality work, and market your products effectively. With the right approach, the D1 Pro’s versatility and efficiency enable entrepreneurs to develop a business that can offer a substantial return on investment.
For full details, see our beginner guide to starting a profitable laser engraving business.
How can I connect with other xTool D1 Pro users for inspiration?
The community housed on the Makeblock forum and Facebook groups provides an excellent platform for xTool users. There, you can exchange ideas, share experiences, and learn from the creativity of others. xTool alsos offers extensive resources, including user guides, video tutorials, and FAQs on their website.
What about xTool M1 Laser & Cutting Machine?
We have done justice to the xTool M1 machine in our review here.
Or you can check out our detailed comparison of the xTool M1 and xTool D1 Pro
xTool D1 Pro 10W or 20W: Which should I buy?
If you are a hobbyist focused on detailed engraving and fine workmanship, the 10W version may suffice. However, if you’re looking to use the machine for business purposes, especially if it involves cutting materials or handling bulk orders where power and speed are essential, the 20W is more appropriate.
Conclusion
Whether for personal satisfaction or commercial ventures, the D1 Pro offers the precision, versatility, and power to bring a plethora of projects to life. From the ease of crafting personalized pet tags and phone stands to the intricate detail required for festive seasonal decorations and wedding favors, the D1 Pro caters to a wide spectrum of laser engraving and cutting needs.
Pinterest Image

Enjoy our articles? You can follow us on Pinterest for more woodworking power tools tips and tricks.
Save on selected power tools from top brands - Shop Now on Zoro.

