YOUR NO 1 WOODWORKING POWER TOOLS RESOURCE WEBSITE
17 Wood Lathe Projects for All Skill Levels: From Novice to Pro

Disclosure: If you click on some of the links, we may earn a small referral fee. Please know that we only recommend products that we use and believe will add value to our readers.
If you’re dipping your toes into woodturning or already dance around the lathe like a pro, our list of projects is about to become your new favorite bookmark. Beginners, fear not; we’ve got you covered with basics like wooden pens and candle holders to get those shavings flying. And for the adept turner wanting to flex their skills, how does chiseling out a fancy bowl or a sophisticated hollow form sound?
Buckle up, because what we have in store is no short stroll. We’re about to dive deep, guiding you through easy-peasy tasks to ones that might just make you break a sweat. But hey, the promise of skill-building and pure satisfaction at the end makes it worth the read, right?
Let’s get that lathe spinning!
Getting Started: Essential Tools and Safety Precautions
Before diving into any DIY lathe project, it’s important to have the right tools and ensure your safety. Here are some essential tools you’ll need:
Lathe Machine
The centerpiece of wood lathe projects is, of course, the lathe machine itself. You can choose between a benchtop or a floor-standing lathe, depending on your workspace and project requirements.
Suggested Articles:
Lathe Power Tool For Woodworking | Beginner’s Guide | Woodturning Basics
Top 6 Best Midi Lathe in the Market (Updated For 2024)
Mini Wood Lathe Reviews: The 8 Best Options on the Market
Chisels
Chisels are the primary cutting tools used in woodturning. You’ll need a set of gouges, skew chisels, and parting tools to shape and remove wood from your projects.
Suggested Articles:
7 Essential Wood Lathe Tools and Accessories For Woodturners (Infographic)
Faceplates and Chuck
These are used to hold the wood securely on the lathe while you work. A faceplate attaches directly to the wood, while a chuck provides a more secure and versatile option.
Suggested Articles:
7 Best Wood Lathe Chuck For Woodturning (+ Buying Guide)
7 Wood Lathe Chuck Types (Explained with Images)
Safety Equipment
Safety should be a top priority when working with power tools. Make sure to wear safety glasses or a face shield to protect your eyes from flying wood chips. Additionally, use ear protection to reduce noise levels and wear a dust mask to avoid inhaling wood dust.
Suggested Articles:
7 Workshop Safety Gears You Should Use As a Woodworker (Practical Options)
Safety Power Tool Switch | 3 Reasons Why You Need It
9 Best Portable Dust Collector Systems For Small Wood Shops
Now that you have an idea of the essential tools, let’s discuss some safety precautions to keep in mind while working with a wood lathe:
Read and Follow the Manual
Familiarize yourself with the manufacturer’s manual for your lathe machine. It contains important safety instructions and proper usage guidelines.
Secure the Workpiece
Always ensure that the workpiece is securely fastened to the lathe machine before starting any turning operation. Loose or improperly secured wood can lead to accidents or damage to the lathe.
Maintain Clear Workspace
Clear your workspace of any clutter or obstructions that may interfere with the lathe operation. Keep your work area clean and organized to reduce the risk of accidents.
Suggested Articles:
Dust Extraction in Woodworking: 9 Best Practices for a Cleaner Workshop
Use Sharp Tools
Sharpen your chisels regularly to maintain their effectiveness. Dull tools require more force and are more likely to cause accidents. Use a sharpening system or a bench grinder to keep your tools sharp.
Work at the Right Speed
Adjust the lathe speed according to the type of wood and the task at hand. Working at the correct speed ensures optimum control and smooth cutting.
Take Breaks
Woodturning can be physically demanding. Take regular breaks to rest and avoid fatigue, which can compromise your safety and the quality of your work.
Beginner-Friendly Wood Lathe Projects
1. Wooden Pen
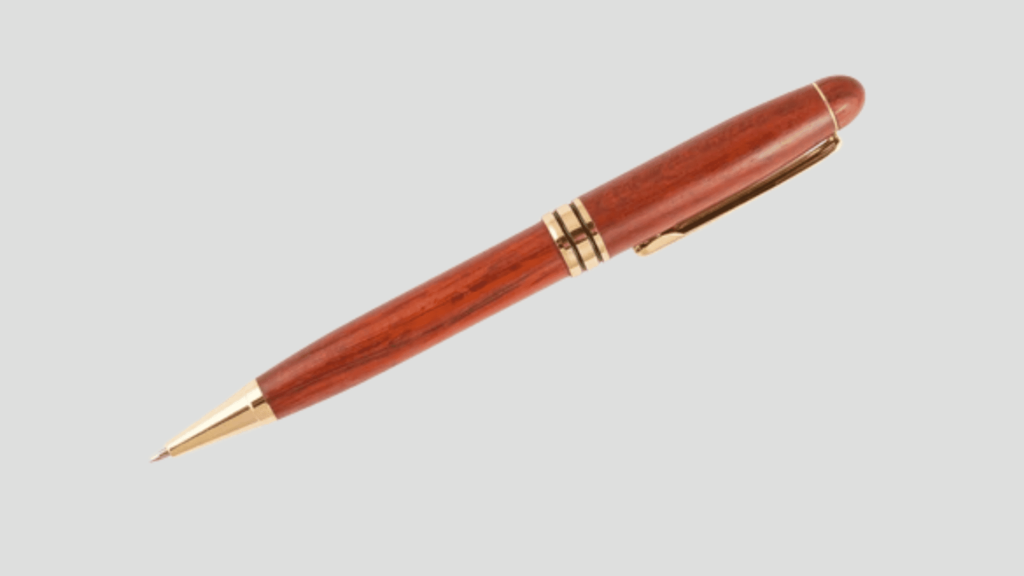
When it comes to beginner wood lathe projects, turning a wooden pen is a fantastic starting point. Not only is it a simple and straightforward project, but it also offers a great opportunity for beginners to practice essential turning techniques. Here’s what you’ll need to get started.
Materials
- Pen blank (wood or acrylic)
- Pen kit (which includes the pen mechanism and hardware)
- Sandpaper (various grits)
- Wood finish or polish
Tools
- Spindle gouge
- Skew chisel
- Parting tool
- Wood lathe
- Lathe chuck or pen mandrel
Instructions
- Prepare the pen blank: Select your desired pen blank and cut it to the appropriate length. Square off the ends of the blank using a benchtop saw or a bandsaw.
- Mount the pen blank: Attach the pen blank securely to the lathe using either a lathe chuck or a pen mandrel.
- Rough shaping: With the lathe at a low speed, use a spindle gouge to rough shape the pen blank, gradually shaping it into your desired design.
- Final shaping and sanding: Use a skew chisel and spindle gouge to refine the shape of the pen, paying attention to the details. Once you’re satisfied with the shape, proceed to sand the pen blank with gradually finer grits of sandpaper, starting from a lower grit (such as 120 or 180) and working your way up to a higher grit (such as 400 or 600). This will ensure a smooth finish.
- Apply a finish: Choose a suitable wood finish or polish and apply it to the pen, following the manufacturer’s instructions. This step helps protect the wood and enhances its appearance.
- Assemble the pen: Follow the instructions provided with the pen kit to assemble the pen mechanism. This typically involves inserting the refill, attaching the pen components, and securing them in place.
Troubleshooting Tips
- Take care to avoid catching the tool on the rotating stock, as it can cause injuries and damage to the project.
- Ensure that the lathe is properly aligned and calibrated before starting the turning process.
- Regularly check your tools for sharpness and resharpen as needed for clean and precise cuts.
- Take your time and work gradually to avoid removing too much material and ruining the pen shape.
2. Bottle Stoppers
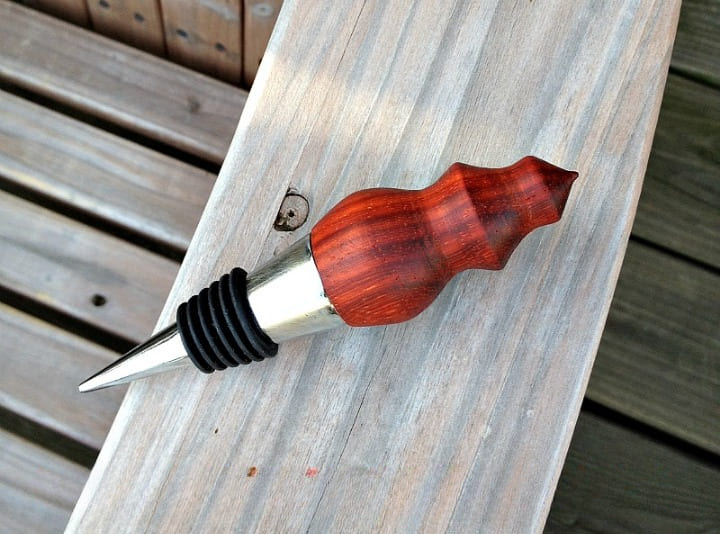
Bottle stoppers are not only practical but also provide a great opportunity for customization and creativity. Whether you’re sealing a bottle of wine or preserving homemade oils, bottle stoppers can add a touch of elegance and functionality. Here’s what you’ll need for this project.
Materials
- Wood blank (preferably hardwood)
- Bottle stopper kit (including the stopper base and hardware)
- Sandpaper (various grits)
- Wood finish or polish
Tools
- Spindle gouge
- Parting tool
- Wood lathe
- Lathe chuck
Instructions
- Prepare the wood blank: Choose a suitable piece of hardwood for your bottle stopper. Square off the ends of the blank and mark the center for mounting on the lathe.
- Mount the wood blank: Securely attach the wood blank to the lathe using a lathe chuck or a faceplate. Ensure it is centered and securely fastened.
- Rough shaping: With the lathe at a slow speed, use a spindle gouge to remove excess material and rough shape the bottle stopper. Begin by creating a tenon or mortise on one end to fit the stopper base.
- Final shaping and refinement: Continue shaping the bottle stopper, paying attention to the overall design and aesthetics. Shape the handle or top portion according to your desired design, using the spindle gouge and parting tool as needed.
- Sanding and finishing: Once you’re satisfied with the shape, sand the bottle stopper thoroughly, starting from a lower grit and gradually progressing to a higher grit. Ensure a smooth surface. Apply a suitable wood finish or polish, following the manufacturer’s instructions.
- Assemble the bottle stopper: Follow the instructions provided with your bottle stopper kit to assemble the hardware onto the wood stopper base. Ensure a secure fit and a smooth transition between the wood and metal components.
Design Variations
- Experiment with different wood species and grain patterns to create unique visual effects.
- Incorporate embellishments such as inlays, carvings, or burned designs for added artistic flair.
- Instead of a traditional cylindrical handle, consider turning a more sculptural or decorative shape, such as a faceted design or a twisted form.
- Explore different finishes, such as natural oils, paint, or epoxy resin coatings, to achieve different looks and protective qualities.
3. Simple Spindle Projects
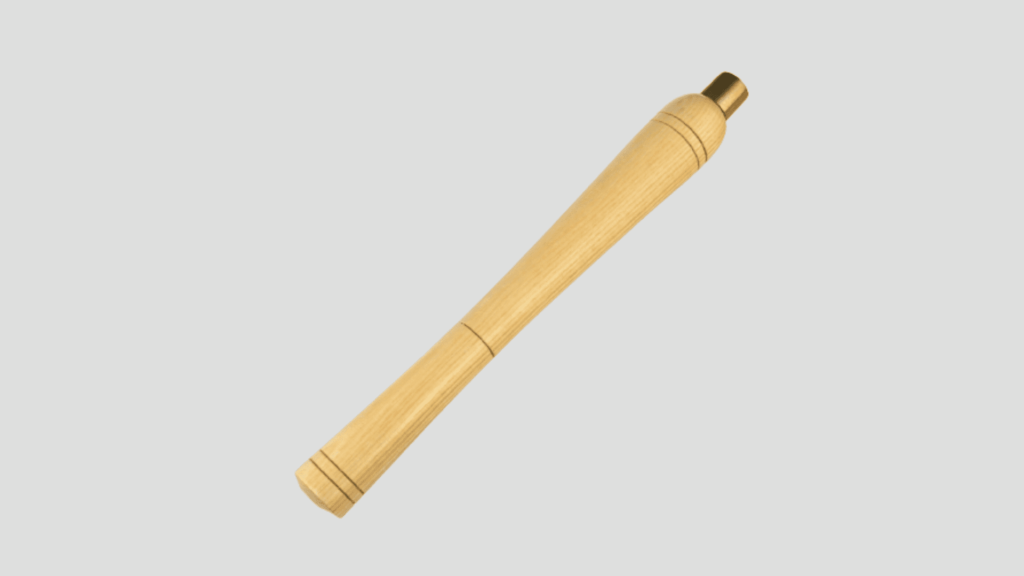
Simple spindle projects like wooden handles, candlesticks, etc, are versatile options for beginners in woodturning. They provide an opportunity to practice basic spindle turning techniques while creating functional and decorative pieces. Here’s what you need to get started.
Materials
- Wood blank (preferably hardwood)
- Sandpaper (various grits)
- Wood finish or polish
Tools
- Spindle gouge
- Parting tool
- Wood lathe
- Lathe chuck or drive center
Instructions for Wooden Handle
- Prepare the wood blank: Choose a suitable hardwood blank for your handle project. Ensure that it is squared off and centered on the lathe.
- Mount the wood blank: Securely attach the wood blank to the lathe using a lathe chuck or a drive center.
- Rough shaping: With the lathe at a low speed, use a spindle gouge to remove excess material and start shaping the handle. Gradually turn the blank to your desired handle shape, considering ergonomics and aesthetics.
- Final shaping and refinement: Once the rough shape is achieved, refine the handle by using the spindle gouge and parting tool to create details, curves, or tapering. This is where you can get creative and experiment with different designs.
- Sanding and finishing: Sand the handle thoroughly, starting from a coarser grit and progressing to finer grits. This will ensure a smooth and polished finish. Apply a wood finish or polish to protect and enhance the appearance of the handle.
Instructions for Candlestick
- Prepare the wood blank: Choose a hardwood blank that is suitable for creating a stable and sturdy candlestick. Square off the ends and mark the center for mounting on the lathe.
- Mount the wood blank: Securely attach the wood blank to the lathe using a lathe chuck or a drive center. Ensure it is centered and securely fastened.
- Rough shaping: With the lathe at a low speed, use a spindle gouge to remove excess material and start shaping the candlestick. Create a base and gradually shape the blank into a pleasing design.
- Final shaping and refinement: Use the spindle gouge and parting tool to refine the shape of the candlestick, paying attention to proportions, curves, and any decorative elements you want to add.
- Sanding and finishing: Sand the candlestick thoroughly, starting from a coarser grit and progressing to finer grits. Pay attention to smoothing out any rough areas or tool marks. Apply a wood finish or polish to protect the wood and give it a polished look.
Additional Project Ideas
- Wooden tool handles: Replace worn-out tool handles with custom wooden ones. Experiment with different shapes and designs to enhance comfort and grip.
- Wooden knobs and pulls: Add a personalized touch to cabinets and drawers by turning wooden knobs and pulls.
- Spindle ornaments: Create small decorative ornaments by turning spindles in various shapes and sizes. These make great gifts or seasonal decorations.
4. Salt and Pepper Shakers

Salt and pepper shakers are not only functional kitchen accessories but also make for a fun and rewarding wood lathe project. Turning your own salt and pepper shakers allows you to create custom designs that match your personal style. Here’s what you’ll need to get started.
Materials
- Wood blank (preferably a durable hardwood)
- Salt and pepper shaker kits (including the hardware and inserts)
- Sandpaper (various grits)
- Wood finish or food-safe finish
Tools
- Spindle gouge
- Parting tool
- Wood lathe
- Lathe chuck or drive center
Instructions
- Prepare the wood blank: Select a suitable hardwood blank that is large enough to accommodate the desired size of your salt and pepper shakers. Square off the ends and mark the center for mounting on the lathe.
- Mount the wood blank: Securely attach the wood blank to the lathe using a lathe chuck or a drive center. Ensure it is centered and securely fastened.
- Rough shaping: With the lathe at a low speed, use a spindle gouge to remove excess material and start shaping the wood blank. Aim for a cylindrical shape to match the intended size of your shakers.
- Final shaping and refinement: Continue shaping the wood blank, using the spindle gouge and parting tool to create the desired design and size. Consider adding decorative elements or grooves for added visual appeal. Pay attention to achieving a consistent diameter for the shakers.
- Sanding and finishing: Begin sanding the salt and pepper shakers using progressively finer grits of sandpaper, starting with a coarser grit and moving to a finer one. Ensure a smooth and polished finish. Apply a suitable wood finish or food-safe finish to protect the wood and seal the surface.
Design Variations and Finishing Options
- Experiment with different wood species to create contrasting or complementary salt and pepper shaker sets.
- Consider incorporating unique design elements such as textured surfaces, segmented designs, or decorative inlays.
- Explore different finishes, such as natural oils or food-safe finishes, to enhance the beauty and durability of the shakers.
5. Tea Light Holders
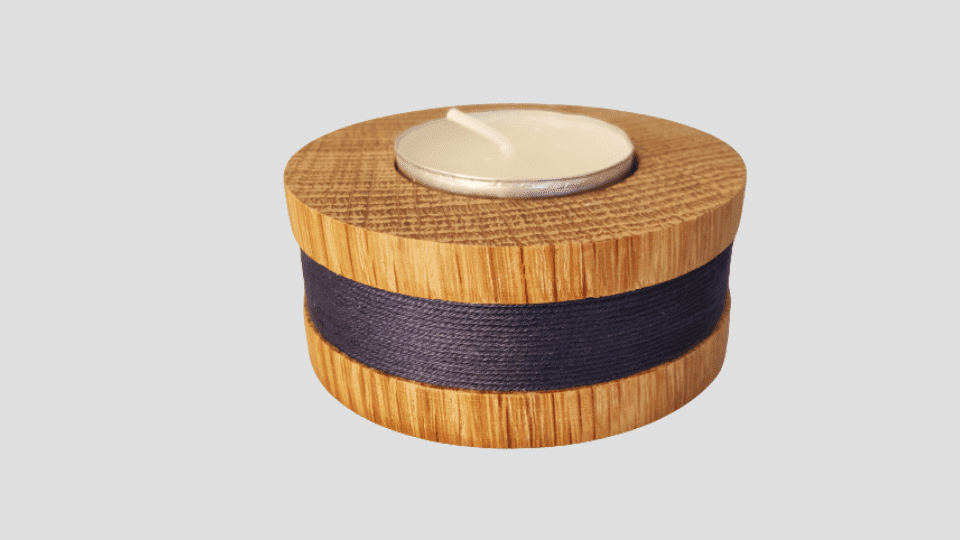
Tea light holders are a popular wood lathe project due to their charm, versatility, and practicality. Not only do they create warm and cozy atmospheres, but they also make fantastic gifts or additions to home decor. Here’s what you’ll need to get started on making your own tea light holders.
Materials
- Wood blank (hardwood or softwood with a pleasing grain pattern)
- Forstner drill bit or hole saw of appropriate size for tea light (learn about the different types of drill bits here)
- Sandpaper (various grits)
- Wood finish or polish
Tools
- Spindle gouge
- Parting tool
- Wood lathe
- Lathe chuck or drive center
- Drill press or hand drill for creating tea light hole
Instructions
- Prepare the wood blank: Choose a wood blank that is suitable in size and shape for your tea light holder design. Cut or square off the wood blank according to your desired dimensions.
- Mount the wood blank: Securely attach the wood blank to the lathe using a lathe chuck or a drive center. Ensure it is centered and securely fastened.
- Rough shaping: With the lathe at a low speed, use a spindle gouge to remove excess material and begin shaping the tea light holder. Create a flat or concave bottom to ensure stability.
- Final shaping and refinement: Continue shaping the tea light holder, using the spindle gouge and parting tool to create decorative details or unique designs. Consider adding grooves, flutes, or scallops to enhance the aesthetic appeal.
- Drilling tea light hole: Once the overall shape is achieved, use a drill press or hand drill equipped with a Forstner drill bit or hole saw of the appropriate size to create a hole in the center of the tea light holder for the tea light to sit in. Be sure to drill to the appropriate depth to accommodate the tea light.
- Sanding and finishing: Proceed to sand the tea light holder thoroughly, beginning with coarser grit sandpaper and progressing to finer grits. This will ensure a smooth and polished surface. Apply a suitable wood finish or polish to protect the wood and enhance its appearance.
Design Variations and Embellishments
- Experiment with different wood species to create varying aesthetics and personalities for your tea light holders.
- Incorporate decorative elements such as carvings, burnings, or inlays to add visual interest and personal touches.
- Explore different styles or shapes such as cylindrical, square, or sculptural designs to create unique and eye-catching tea light holders.
- Play with surface textures using texturing tools or techniques to add dimension and tactile appeal.
- Consider incorporating embellishments like beads, gems, or metal accents for added elegance or a touch of sparkle.
6. Wooden Mallet
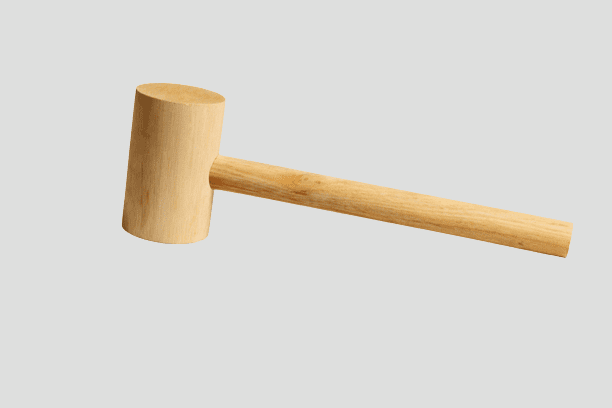
A wooden mallet is a useful tool that has various applications in woodworking. Whether you’re shaping wood, assembling furniture, or working on joinery, a wooden mallet provides controlled impacts without damaging delicate surfaces. Here’s what you’ll need to get started on making your own wooden mallet.
Materials
- Hardwood blank (such as maple, beech, or oak)
- Sandpaper (various grits)
- Wood finish or polish
Tools
- Spindle gouge
- Parting tool
- Wood lathe
- Lathe chuck or drive center
Instructions
- Prepare the wood blank: Select a hardwood blank that is suitable in size and weight for your mallet. Square off the ends and mark the center for mounting on the lathe.
- Mount the wood blank: Securely attach the wood blank to the lathe using a lathe chuck or a drive center. Ensure it is centered and securely fastened.
- Rough shaping: With the lathe at a low speed, use a spindle gouge to remove excess material and begin shaping the mallet. Create the basic handle shape by turning a cylindrical section on one end of the blank.
- Final shaping and refinement: Continue shaping the mallet handle, using the spindle gouge and parting tool to achieve the desired thickness and taper. Pay attention to maintaining balance and comfort in your hand, as the handle should be ergonomic.
- Shaping the head: Use the spindle gouge to shape the mallet head, creating rounded edges and a flat striking surface. Consider adding decorative details or texture for added visual appeal.
- Sanding and finishing: Proceed to sand the wooden mallet thoroughly, starting with coarser grit sandpaper and progressing to finer grits. Ensure a smooth and polished surface. Apply a suitable wood finish or polish to protect the wood and enhance its appearance.
Proper Shaping and Balance
Achieving proper shaping and balance is crucial for a functional wooden mallet. The handle should be comfortable to hold and provide a secure grip. Avoid sharp edges or corners that may cause discomfort during use. Additionally, the weight distribution between the handle and the head should provide sufficient striking force while maintaining control.
To achieve the desired balance, pay attention to the thickness and taper of the handle, ensuring it gradually transitions into the head. Test the mallet’s balance as you shape it, making adjustments as necessary.
7. Bottle Openers
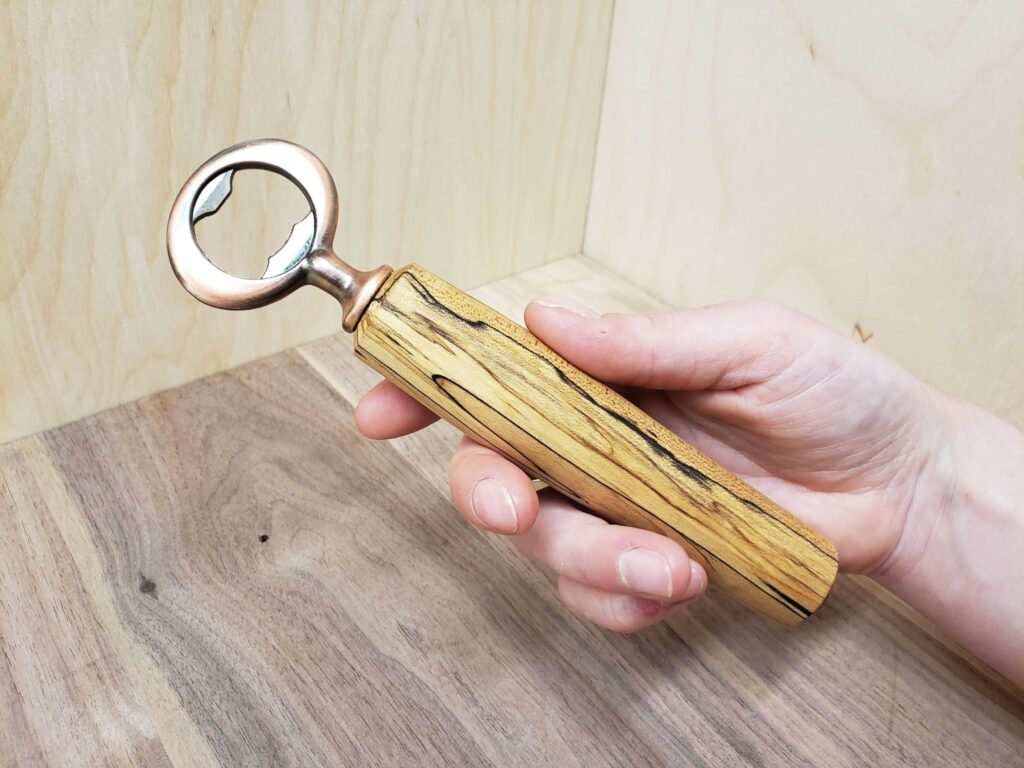
Bottle openers are not only convenient tools in the kitchen or at parties, but they also offer a great opportunity for customization. Creating your own wooden bottle opener allows you to add a personal touch while showcasing your woodturning skills. Here’s what you’ll need to get started.
Materials
- Wood blank (preferably a hardwood for durability)
- Bottle opener hardware or insert
- Sandpaper (various grits)
- Wood finish or polish
Tools
- Spindle gouge
- Parting tool
- Drill press or hand drill
- Lathe chuck or drive center
Instructions
- Prepare the wood blank: Select a hardwood blank suitable in size and thickness for your bottle opener design. Square off the ends and mark the center for mounting on the lathe.
- Mount the wood blank: Securely attach the wood blank to the lathe using a lathe chuck or a drive center. Ensure it is centered and securely fastened.
- Rough shaping: With the lathe at a low speed, use a spindle gouge to remove excess material and start shaping the bottle opener handle. Gradually taper the handle and create a comfortable grip shape.
- Final shaping and refinement: Continue shaping the bottle opener handle, refining the design and ensuring a balanced and ergonomic fit. Use the spindle gouge and parting tool to add details and accents as desired.
- Drilling holes: Use a drill press or hand drill to create a centered hole on one end of the bottle opener for inserting the opener hardware or insert. Ensure the hole size matches the hardware you have.
- Sanding and finishing: Begin sanding the bottle opener handle using progressively finer grits of sandpaper. Focus on achieving a smooth and polished surface. Apply a suitable wood finish or polish to protect the wood and enhance its appearance.
Design Variations and Ideas for Handles
- Experiment with different wood species and grain patterns to create unique and eye-catching handles.
- Incorporate decorative elements such as inlays, carvings, or burned designs for added personalization.
- Explore different handle shapes and sizes, such as cylindrical, tapered, or contoured grips, to suit individual preferences.
- Consider incorporating unique materials into the handle design, such as resin, metal accents, or reclaimed wood.
8. Door Stopper
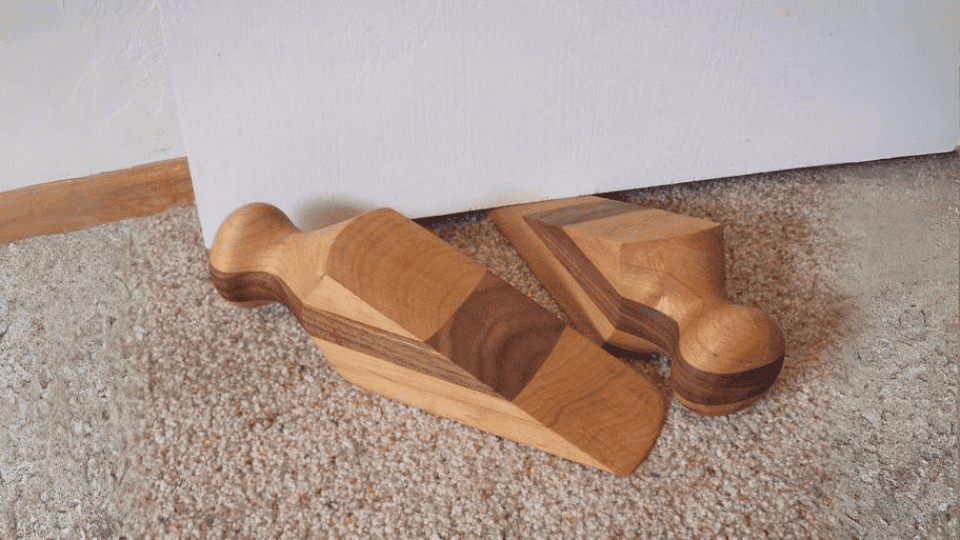
Having a functional and well-crafted wooden door stopper can not only provide convenience but also add a touch of style to your home. Here’s what you’ll need to get started.
Materials
- Wooden blank (preferably a hardwood for durability)
- Sandpaper (various grits)
- Wood finish or polish
Tools
- Spindle gouge
- Parting tool
- Wood lathe
- Lathe chuck or drive center
Instructions
- Prepare the wooden blank: Choose a suitable hardwood blank that is proportionate to the size and weight you desire for your door stopper. Square off the ends and mark the center for mounting on the lathe.
- Mount the wooden blank: Securely attach the wooden blank to the lathe using a lathe chuck or a drive center. Ensure it is centered and securely fastened.
- Rough shaping: With the lathe at a low speed, use a spindle gouge to remove excess material and begin shaping the door stopper. Create a flat or rounded bottom to ensure stability when in use.
- Final shaping and refinement: Continue shaping the door stopper, using the spindle gouge and parting tool to achieve the desired design. Consider adding decorative elements or details such as flutes, grooves, or carvings to customize the door stopper to your preference.
- Sanding and finishing: Begin sanding the door stopper using progressively finer grits of sandpaper, ensuring a smooth and polished surface. Pay special attention to rounding any sharp edges or corners. Apply a suitable wood finish or polish to protect the wood and enhance its appearance.
Design Options and Customization
- Explore different shapes for the door stopper, such as a cylindrical design or a tapered wedge shape.
- Consider incorporating decorative elements or accents, such as woodburning, inlays, or contrasting wood species, to add visual interest.
- Personalize the door stopper by engraving or carving initials, patterns, or designs that match your home decor or personal style.
- Experiment with different wood finishes to achieve the desired look. You can opt for a natural wood finish, stains, or even paint the door stopper.
9. Wooden Rings
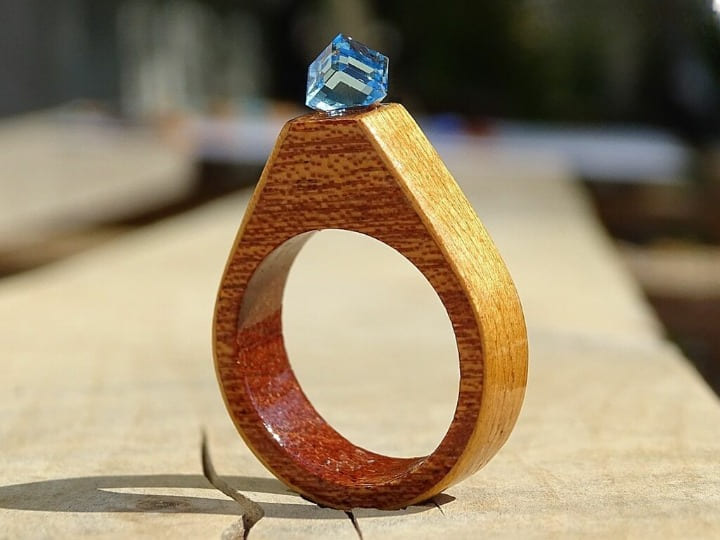
Wooden rings have been gaining popularity in recent years for their unique and natural appeal. They offer a personalized and distinctive alternative to traditional metal rings, making them a popular choice for individuals seeking a one-of-a-kind accessory. Below is what you’ll need to get started on making your own wooden rings.
Materials
- Exotic or domestic hardwood blanks (suitable thickness and width for your desired ring size)
- Sandpaper (various grits)
- Wood finish or polish
Tools
- Spindle gouge
- Parting tool
- Wood lathe
- Lathe chuck or drive center
Instructions
- Prepare the wood blank: Select a hardwood blank with a suitable thickness and width for your desired ring size. Square off the ends and mark the center for mounting on the lathe.
- Mount the wood blank: Securely attach the wood blank to the lathe using a lathe chuck or a drive center. Ensure it is centered and securely fastened.
- Rough shaping: With the lathe at a low speed, use a spindle gouge to remove excess material and start shaping the wooden ring. Begin by roughing out the outer shape, considering the desired width and profile of the ring.
- Final shaping and refinement: Continue shaping the wooden ring, focusing on achieving the desired size and smoothness. Use the spindle gouge and parting tool to refine the inner and outer surfaces of the ring, ensuring a comfortable fit.
- Sanding and finishing: Begin sanding the wooden ring using progressively finer grits of sandpaper. Pay attention to achieving a smooth and polished surface. Apply a suitable wood finish or polish to protect the wood and enhance its appearance.
Design Ideas and Suggestions for Different Wood Types
- Exotic hardwoods: Experiment with unique wood species such as padauk, rosewood, ebony, or purpleheart to create vibrant and richly colored rings.
- Domestic hardwoods: Utilize woods like maple, walnut, or cherry for a classic and elegant look. These woods can be easily sourced and offer natural beauty.
- Inlays and embellishments: Consider incorporating other materials such as metal, gemstones, or resin to create visually intriguing designs. Inlays can add an additional layer of customization and personalization to your wooden rings.
10. Key Chains
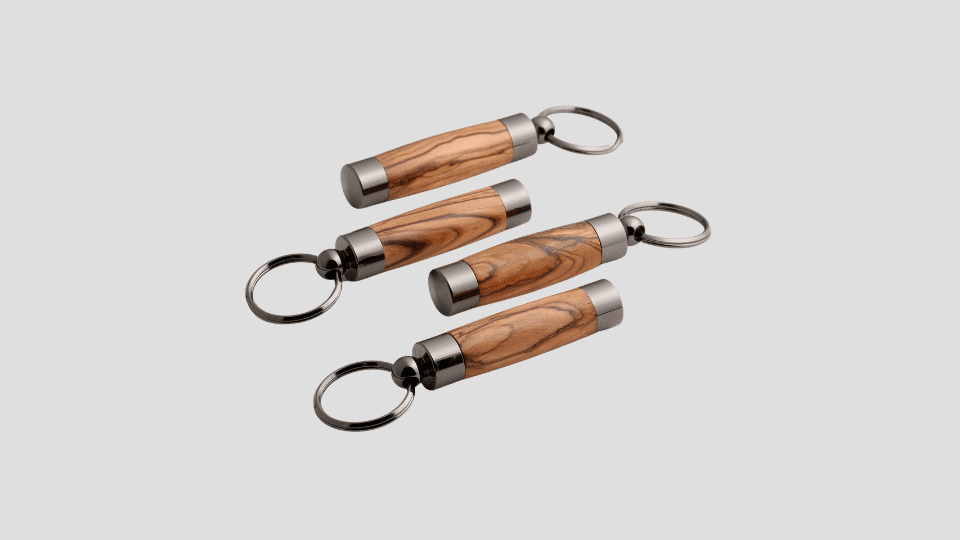
Key chains are a simple and practical wood lathe project that allows for customization and personalization. Not only can you create unique key chains for yourself, but they also make great gifts for family and friends. Below is what you’ll need to get started.
Materials
- Wood blank (preferably a hardwood)
- Key chain hardware (split rings or screw-eye hooks)
- Sandpaper (various grits)
- Wood finish or polish
Tools
- Spindle gouge
- Parting tool
- Wood lathe
- Lathe chuck or drive center
Instructions
- Prepare the wood blank: Choose a suitable hardwood blank that is proportionate to the size and design you desire for your key chain. Square off the ends and mark the center for mounting on the lathe.
- Mount the wood blank: Securely attach the wood blank to the lathe using a lathe chuck or a drive center. Ensure it is centered and securely fastened.
- Rough shaping: With the lathe at a low speed, use a spindle gouge to remove excess material and start shaping the key chain. Begin by creating the desired shape for the key chain, such as a disc, rectangle, or unique design.
- Final shaping and refinement: Continue shaping the key chain, refining the design and ensuring smooth edges and surfaces. Use the spindle gouge and parting tool to add details or accents as desired.
- Sanding and finishing: Proceed to sand the key chain thoroughly, starting with coarser grit sandpaper and progressing to finer grits. Pay attention to achieving a smooth and polished surface. Apply a suitable wood finish or polish to protect the wood and enhance its appearance.
Designs and Personalization
- Explore different shapes and sizes for your key chains, such as geometric shapes, animals, initials, or symbols.
- Consider engraving or woodburning techniques to add personalized messages, names, or designs to the key chain.
- Experiment with inlays using contrasting wood species, resin, or other materials to create unique patterns or visual interest.
Intermediate to Advanced Wood Lathe Projects
11. Bowl Turning
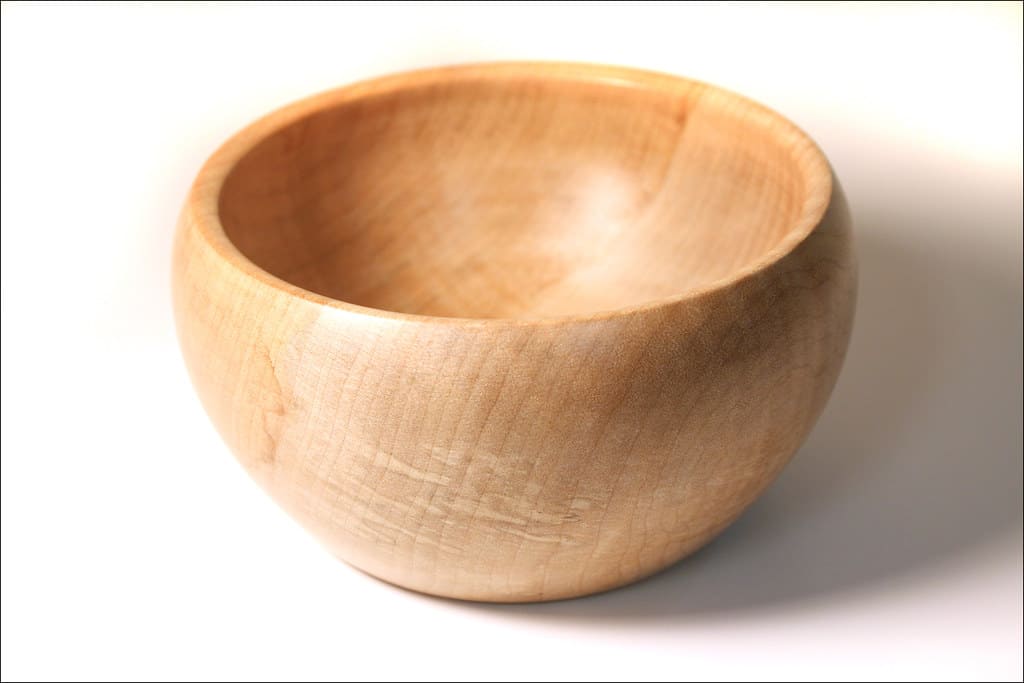
Bowl turning is a challenging yet rewarding wood lathe project that allows you to create beautiful and functional bowls. It requires a higher level of skill and precision compared to beginner projects, but with practice and patience, you can achieve stunning results.
Skills Necessary for Bowl Turning
Spindle Turning: A solid understanding of spindle turning techniques is essential as bowl turning involves shaping the exterior of the bowl using spindle gouges and parting tools.
Hollowing: Hollowing out the interior of the bowl requires advanced turning skills. It involves using specialized tools such as bowl gouges, scrapers, and hollowing systems to achieve desired depths and shapes.
Grain Orientation: Understanding grain direction and planning your cuts accordingly is crucial to avoid tear out and ensure a smooth finish on the bowl interior and exterior.
Tool Control: Developing good tool control and mastering different cuts, such as shear scraping, learning the techniques for creating curves and details on the bowl, and refining the overall shape of the bowl.
Materials and Tools Required
- Wood blank of suitable size and species for your desired bowl
- Spindle gouges and bowl gouges of various sizes
- Parting tool
- Bowl scraper or negative rake scraper
- Faceplate or chuck for mounting the wood blank
- Calipers for measuring thickness and dimensions
- Sandpaper or sanding pads of various grits
- Wood finish or polish for final surface treatment
Basic Instructions for Bowl Turning
- Prepare the wood blank: Choose a suitable wood blank with the desired size and grain pattern for your bowl. Square off the ends and attach a faceplate or chuck to secure it on the lathe.
- Rough shaping: With the lathe at a low speed, use a spindle gouge to remove excess material and turn the blank into a rough bowl shape. Focus on establishing the outer curves, thickness, and foot of the bowl.
- Hollowing: Using a bowl gouge or hollowing tool, carefully hollow out the interior of the bowl. Start from the center and work your way outwards, paying attention to maintaining a consistent wall thickness and achieving a pleasing bowl profile.
- Refining the shape: Once the interior is hollowed, refine the exterior shape of the bowl using various turning tools. Smooth out any tool marks or imperfections on the surface. Use calipers to check for even wall thickness.
- Sanding and finishing: Carefully sand the bowl with progressively finer grits of sandpaper or sanding pads to achieve a smooth surface. Then, apply a wood finish or polish to enhance the natural beauty of the wood and provide protection.
Tips for Achieving Different Shapes and Finishes
- Experiment with different bowl profiles, such as deep bowls, shallow bowls, or square bowls, to explore various design possibilities.
- Consider incorporating decorative elements like textured surfaces, segmented designs, or contrasting wood accents.
- To achieve different finishes, you can leave the wood natural for a rustic look, apply a clear finish for a glossy appearance, or use various techniques like painting or staining for a more artistic touch.
12. Hollow Forms
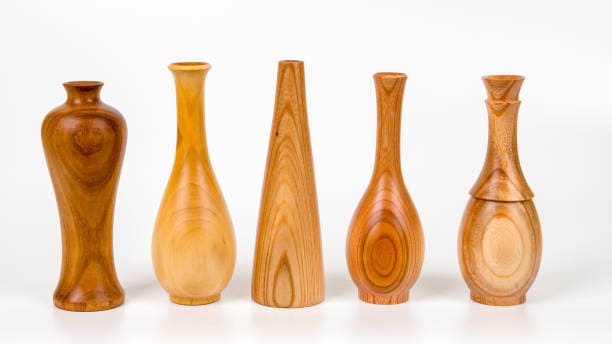
Hollow forms are fascinating wood lathe projects that involve turning a vessel with a hollowed-out interior. They present a unique challenge compared to other woodturning projects, as they require more advanced skills and techniques.
Concept and Challenge of Hollow Forms
Hollow forms are created by carefully hollowing out the interior of a turned vessel while maintaining a consistent wall thickness. This requires precise control of the cutting tools and a good understanding of grain orientation to prevent tearout and maintain stability. The challenge lies in achieving a balanced shape, achieving smooth curves, and creating a pleasing overall form.
Materials and Tools Required
- Wood blank of suitable size and species for your desired hollow form
- Bowl gouges of various sizes
- Hollowing tools, such as scrapers, hook tools, or specialty hollowing systems
- Parting tool
- Calipers for measuring wall thickness
- Sandpaper or sanding pads of various grits
- Wood finish or polish for final surface treatment
Basic Instructions for Hollowing a Vase-like Hollow Form
- Prepare the wood blank: Choose a wood blank with the desired size and species for your hollow form. Mount it securely on the lathe, preferably using a chuck for stability.
- Rough shaping: Begin by rough shaping the exterior of the hollow form using bowl gouges. Focus on establishing the desired form, paying attention to curves, proportions, and aesthetics.
- Hollowing the interior: Gradually hollow out the interior of the hollow form using specialized hollowing tools or scrapers. Start from the opening and work your way towards the base, maintaining a consistent wall thickness and avoiding any catches or tearout.
- Refining the shape: Once the initial hollowing is complete, refine the exterior shape of the hollow form, making any necessary adjustments to achieve a visually appealing and balanced design. Use bowl gouges and scrapers to smooth out curves and refine details.
- Sanding and finishing: Thoroughly sand the hollow form, starting with coarser grits of sandpaper and progressing to finer grits. Pay attention to smoothing any tool marks or imperfections. Apply a suitable wood finish or polish to enhance the natural grain and protect the wood.
Potential Creative Variations
- Explore different forms such as tall, vase-like hollow forms, round or spherical shapes, or asymmetric designs.
- Experiment with surface textures, carving, or embellishments to add visual interest and personal flair to your hollow forms.
- Incorporate contrasting wood or decorative elements like inlays, segmented rings, or natural edges to create unique and eye-catching hollow forms.
13. Woodturning Art: Sculptural Pieces

Woodturning art opens up a whole new dimension for experienced turners, allowing them to explore their creativity and push the boundaries of traditional woodturning. Sculptural pieces showcase the artistic possibilities that can be achieved with a lathe, turning wood into captivating and unique works of art.
Woodturning art takes woodturning beyond functional pieces and delves into the realm of sculpture. It allows experienced turners to create expressive and abstract forms, emphasizing curves, textures, and intricate details. The possibilities are limited only by your imagination and skill.
Artistic Possibilities and Techniques
Woodturning art involves utilizing advanced techniques and tools to shape wood into non-traditional forms. This can include free-form turning, multi-axis turning, carving, texturing, and incorporating other materials into the design. The process often requires careful planning, attention to symmetry, and a mastery of tool control to achieve the desired artistic expression.
Highlighting Notable Examples
Notable examples of woodturning art include delicate spindle sculptures, intricate segmented sculptures, complex organic forms, and abstract geometric shapes. Artists like David Ellsworth, Melvin Lindquist and Betty Scarpino are renowned for their contributions to the field of woodturning art and have created stunning works that challenge the boundaries of what is possible with a lathe.
Approaching Sculptural Projects as a Beginner
For beginners interested in exploring sculptural projects, it is advisable to start with guidance and instruction. Consider taking workshops or classes led by experienced woodturning artists who specialize in sculptural pieces. They can provide insights into design principles, tool techniques, and the process of conceptualizing and executing sculptural projects. Additionally, seeking inspiration from established artists and studying their techniques can help you develop your own style and approach to woodturning art.
14. Lidded Boxes
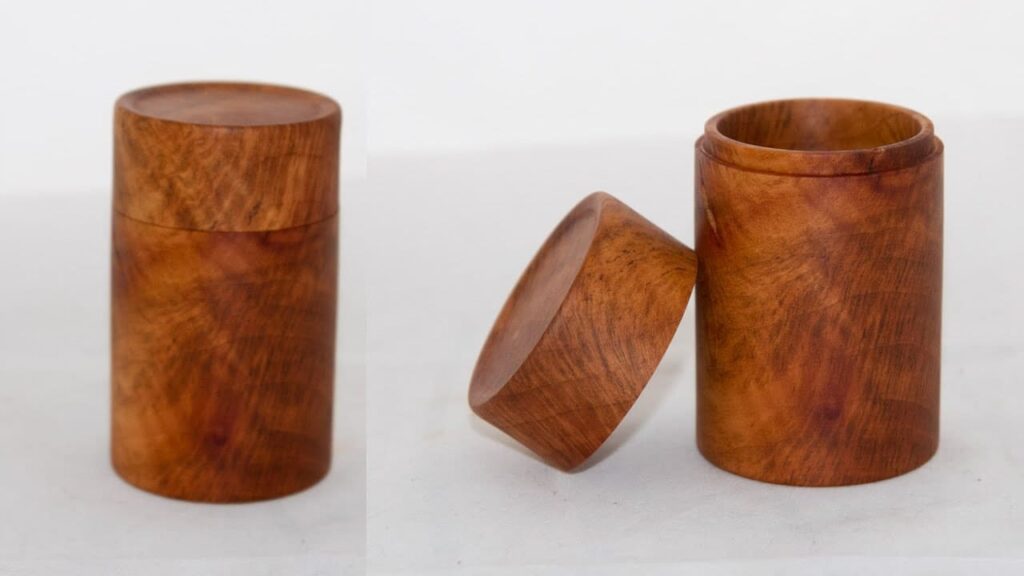
Lidded boxes are intricate and versatile projects that showcase both the craftsmanship and creativity of an experienced woodturner. These boxes not only provide storage solutions but also serve as decorative pieces and potential heirlooms.
Complexity and Versatility
Lidded boxes involve more complexity compared to simple bowls or vases. They require precise measurement, tight-fitting lids, and attention to detail in both the box and lid components. The versatility lies in the various designs, sizes, and ways to incorporate decorative elements, such as inlays, finials, or carved accents, making each lidded box a unique and expressive piece.
Materials and Tools Required
- Wood blanks of various sizes and species, suitable for the desired box and lid dimensions
- Bowl gouges, parting tools, and other turning tools for shaping and hollowing the box
- Chuck or faceplate for mounting the wood blanks securely on the lathe
- Drill press or hand drill for creating the lid finial or handle
- Sandpaper or sanding pads of various grits
- Wood finish or polish for final surface treatment
Basic Instructions for Making a Lidded Box
- Prepare the wood blanks: Select suitable wood blanks for both the box and lid components. Ensure they are squared off and of appropriate sizes for the desired dimensions. Mount the box blank securely on the lathe.
- Rough shaping and hollowing: With the lathe at a low speed, use turning tools like bowl gouges and parting tools to rough shape the outside of the box and hollow out the interior. Pay attention to maintaining a consistent wall thickness and achieving a pleasing shape.
- Create the lid: Once the box component is complete, mount the lid blank securely on the lathe. Shape the outside of the lid, considering proportions that match the box. Create a tenon or recess at the bottom of the lid to ensure a secure fit.
- Finishing touches: Sand the box and lid components, starting with coarser grits and progressing to finer grits for a smooth finish. Pay attention to sanding inside the box and the lid tenon for a precise fit. Apply a suitable wood finish or polish to enhance the natural beauty of the wood.
Different Methods for Creating Lids and Adding Decorative Elements
Finials: A finial is a decorative element often found on the top of a lidded box. It can be a turned wooden knob, a carved design, or a combination of materials like wood and metal. Use a drill press or hand drill to create a hole in the center of the lid and shape the finial to your desired design.
Inlays: Consider adding decorative inlays to the lid or sides of the box. Inlays can be made from contrasting wood species, resin, or even other materials like metal or crushed stone. Create recesses using carving tools or a router, then insert the inlay material and sand it flush with the surface.
Handles: Depending on the design, adding a handle to the lid can enhance the functionality and aesthetics of the lidded box. Turn a small wooden knob or choose a complementary material like metal or leather for the handle. Attach it securely to the lid using appropriate hardware or adhesive.
15. Jewelry Pendants
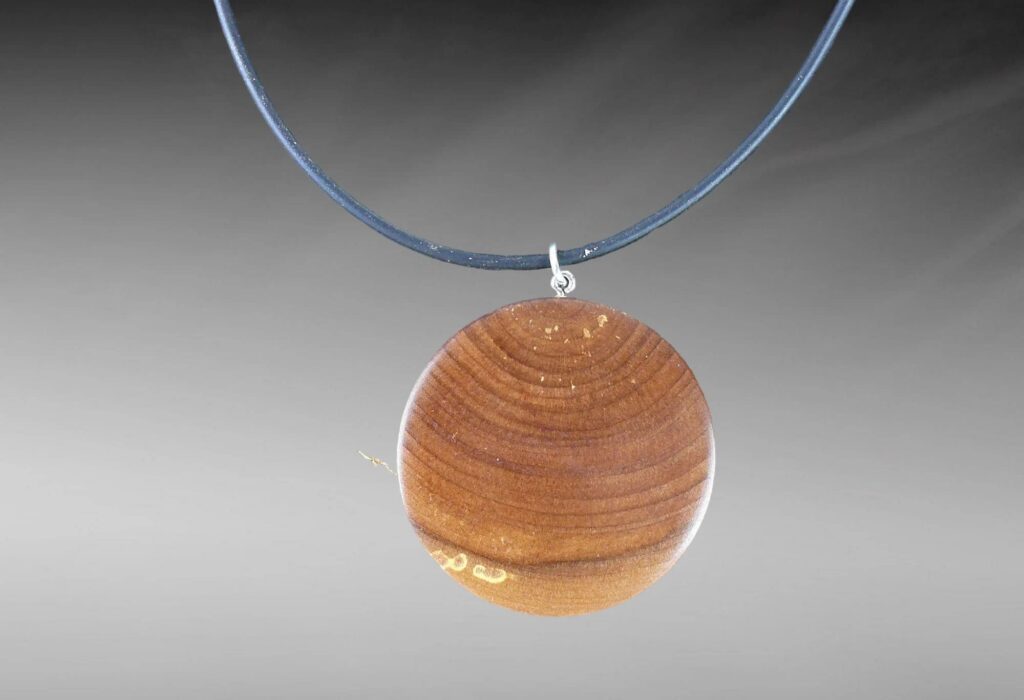
Jewelry pendants are a captivating and intricate project that requires a high level of precision and attention to detail. They offer a unique opportunity to showcase your woodworking skills and create one-of-a-kind wearable art.
Appeal and Precision Required
Jewelry pendants are highly appealing due to their intricacy and the ability to highlight the natural beauty of wood. The precision required in shaping and finishing the pendant ensures that it is visually striking and comfortable to wear. The small size of pendants demands attention to minute details and careful execution to achieve a flawless result.
Materials and Tools Required
- Wood blanks of suitable size and species for your desired pendant design
- Fine spindle gouges or other small turning tools for intricate shaping
- Parting tool for separating the pendant from the blank
- Jewelry findings such as bails or jump rings for attaching the pendant to a chain or cord
- Sandpaper or sanding pads of various grits for a smooth finish
- Wood finish or polish suitable for jewelry use
Basic Instructions for Making Jewelry Pendants
- Select the wood: Choose a small wood blank with a fine grain pattern and suitable hardness for the pendant. Exotic woods or stabilized wood blanks work particularly well for jewelry pieces.
- Mount the wood blank: Securely attach the wood blank to the lathe using a suitable chuck or collet. Ensure it is centered and securely fastened.
- Shape the pendant: With the lathe at a low speed, use fine spindle gouges or small turning tools to shape the pendant. Pay close attention to proportions and symmetry, considering the desired design and cradling points for any inlay or gemstones.
- Refine the details: Continue refining the shape and details of the pendant, ensuring smooth transitions, crisp edges, and consistent thickness. Take extra care when shaping delicate areas or adding decorative elements.
- Sanding and finishing: Sand the pendant with progressively finer grits of sandpaper or sanding pads to achieve a silky-smooth surface. Pay attention to small crevices and details. Apply a suitable wood finish or polish to protect the wood and enhance its appearance.
Design Variations and Suggestions for Incorporating Gemstones or Other Materials
Consider incorporating gemstones, resin, or other materials to add color and visual interest to the pendant. You can create settings or inlays to securely hold the gemstones or materials of choice.
Experiment with different pendant shapes, such as geometric forms, flowing organic designs, or intricate filigree patterns.
Explore techniques like pyrography, carving, or texturing to add unique textures or designs to the pendant.
Incorporate contrasting wood species or other materials like metal or glass for an eye-catching combination of materials.
16. Kitchen Utensils (e.g., spoons, spatulas)
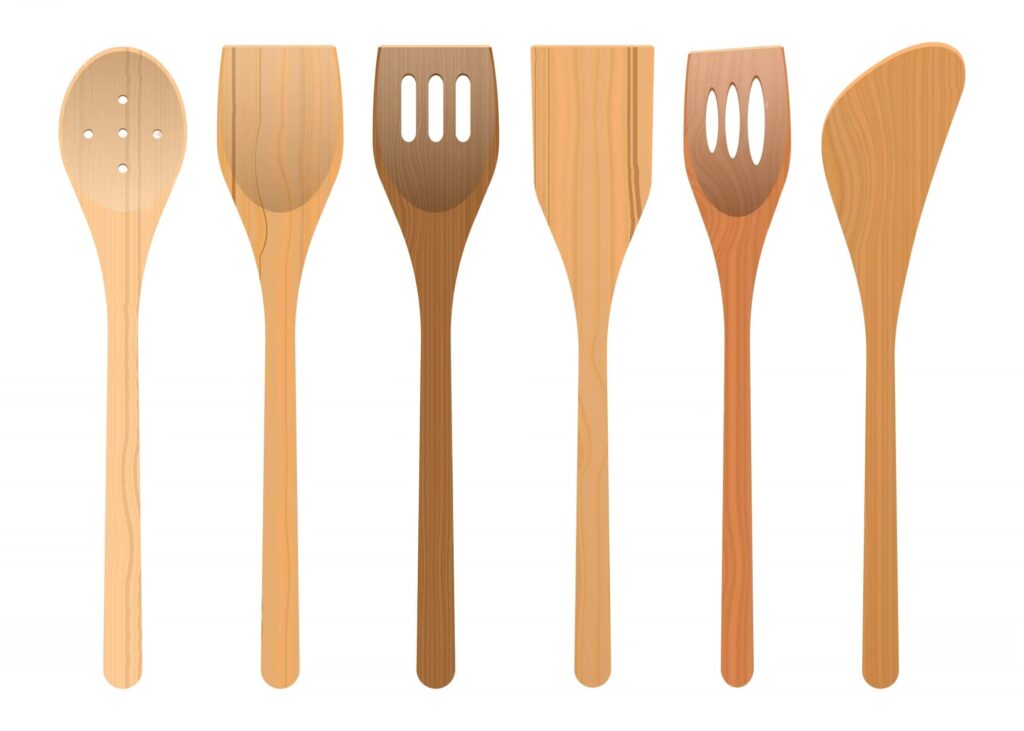
Wooden kitchen utensils, such as spoons and spatulas, offer both aesthetic and functional benefits in the kitchen. They bring a touch of natural beauty to the cooking and serving experience, and wooden utensils are gentle on delicate cookware, reducing the risk of scratches. Here’s what you need to know about creating these kitchen essentials on a wood lathe.
Materials and Tools Required
- Wood blanks of suitable species, such as maple, cherry, or walnut, that are food-safe and durable
- Spindle gouges, scrapers, and other turning tools for shaping and refining the utensils
- Sandpaper or sanding pads of various grits for achieving smooth surfaces
- Food-grade finishes or oils suitable for wooden utensils (e.g., mineral oil, beeswax)
Basic Instructions for Making Kitchen Utensils
- Select the wood blank: Choose a wood blank that is properly seasoned, free of defects, and appropriate for food contact. Consider the desired size and shape of the utensil you want to make.
- Mount the wood blank: Securely attach the wood blank to the lathe using a suitable chuck or faceplate. Ensure it is securely fastened and properly balanced.
- Shape the handle: Use spindle gouges and other turning tools to shape the handle of the utensil to the desired design. Pay attention to ergonomics, creating a comfortable grip.
- Shape the working end: Shape the working end of the utensil (spoon or spatula) using turning tools or scrapers, making sure to achieve the desired curvature and functionality.
- Sanding and finishing: Sand the utensil thoroughly, starting with coarser grits and progressing to finer grits for a smooth surface. Remove any tool marks or rough spots. Apply a food-grade finish or oil to protect the wood and enhance its appearance. Follow the manufacturer’s instructions for application and drying times.
Tips for Achieving Smooth Surfaces and Food-Grade Finishes
Take your time when sanding to ensure a smooth surface. Start with coarser grits and work your way up to finer grits for a polished finish.
Consider using food-grade finishes or oils that are specifically formulated for contact with food. These finishes should be non-toxic and safe for consumption.
Be mindful of any potential wood allergies or sensitivities. Some individuals may have allergies to certain wood species, so it’s important to select wood blanks that are hypoallergenic and safe for kitchen use.
Regularly maintain and refinish your wooden utensils to ensure they stay in top condition. This includes reapplying food-safe finishes or oils as needed.
17. Chess Pieces

Turning chess pieces is a challenging and rewarding project that requires both skill and artistry. It allows experienced turners to showcase their craftsmanship and attention to detail while creating unique and functional pieces for the game of chess.
Materials and Tools Required
- Wood blank of suitable size and species for your desired chess pieces (common choices include hardwoods like maple, walnut, or rosewood)
- Spindle gouges and bowl gouges of various sizes
- Parting tool
- Lathe with a suitable chuck or other mounting method
- Calipers for measuring dimensions and proportions
- Sandpaper or sanding pads of various grits
- Wood finish or polish for final surface treatment
Basic Instructions for Turning a Chess Piece (Rook)
- Prepare the wood blank: Choose a suitable wood blank for the rook chess piece. Mount it securely on the lathe, ensuring it is centered and securely fastened.
- Rough shaping: With the lathe at a low speed, use spindle gouges and other appropriate turning tools to remove excess material and establish the basic shape of the rook. Focus on achieving the desired dimensions, proportions, and details.
- Refining the shape: Continuously refine the shape of the rook, paying close attention to achieving symmetry and details such as the crenellations on the top. Use gouges and other tools to shape the piece smoothly and accurately.
- Sanding and finishing: Thoroughly sand the rook piece, starting with coarser grit sandpaper and progressing to finer grits. This will ensure a smooth and polished surface. Apply a suitable wood finish or polish to enhance the natural beauty of the wood and provide protection.
Importance of Precision and Attention to Detail
Precision and attention to detail are crucial when turning chess pieces. Each chess piece should have symmetrically shaped components and consistent dimensions to maintain balance and visual harmony. Paying close attention to details such as ridges, curves, and tapering ensures that the pieces are recognizable and aesthetically pleasing. It is essential to maintain a high level of precision throughout the turning process to create chess pieces that are both visually appealing and functional.
Frequently Asked Questions (FAQs)
Can I start wood lathe projects as a complete beginner?
Absolutely! Wood lathe projects can be enjoyed by beginners. Starting with simple projects like pens or bowls allows you to learn basic turning techniques and gain confidence. As you progress and develop your skills, you can take on more challenging projects.
How do I choose the right wood for my projects?
This depends on factors such as the desired appearance, durability, and suitability for the project’s purpose. Common wood species used in woodturning include maple, walnut, cherry, and oak. Consider the wood’s grain pattern, hardness, and ease of turning when making your selection.
Can I turn irregularly shaped objects on a wood lathe?
While the primary function of a wood lathe is to turn cylindrical objects, it is possible to turn irregularly shaped objects as well. However, it may require additional techniques or specialized accessories like chuck jaws or custom-made faceplates to securely hold the irregular shape during turning.
What are some tips for achieving smooth finishes on my turned projects?
To achieve smooth finishes on your turned projects, start by using sharp tools and practicing proper tool techniques. Take light cuts and gradually work your way up to the desired shape. Sanding is essential for achieving a polished surface—start with coarser grit sandpaper and gradually progress to finer grits. Lastly, apply a suitable wood finish or polish to protect and enhance the appearance of the project.
Are there online communities or resources available for wood lathe enthusiasts?
Yes, there are several online communities and resources available for wood lathe enthusiasts. Websites, forums, and social media platforms provide opportunities to connect with fellow turners, share ideas and techniques, and seek advice. Some popular woodturning resources include woodworking forums and YouTube channels dedicated to woodturning demonstrations and tutorials.
Final Verdict
Wood lathe projects offer endless opportunities for creativity and skill development. Whether you’re a novice exploring the world of woodturning or an experienced turner seeking new challenges, this guide has provided a range of project ideas and guidance to help you enhance your turning skills and create beautiful pieces. Embrace the artistry and craftsmanship of woodturning, and enjoy the satisfaction of transforming blocks of wood into works of art. Happy turning!
Enjoy our articles? You can follow us on Pinterest for more woodworking power tools tips and tricks.
Save on selected power tools from top brands - Shop Now on Zoro.


